Filter
Filter
Category
Category
-


Plein air painting has changed my life. The excitement of slinging my pochade box over my shoulder and setting out on a painting adventure is intoxicating. Being able to set up anywhere within a few minutes has encouraged me to paint often, to more closely observe the things around me, to hone my memory as I strive to capture a fleeting moment, and to constantly learn how to mix colors...

I surveyed the hills and valleys in front of me. The land was covered in organized rows of 100 year old grape vines and olive trees, interrupted only by winding dirt roads connecting farms to the outside world. Terra Cotta-roofed houses speckled the landscape, and in the distance the hills transformed into mountains. The sun felt warm on my skin and the smell of fresh soil filled the air. As I looked up from my paint palette and over my canvas, I wondered at how this place must have looked when Leonardo was born. I had come here to Vinci, Italy to paint and to remember the importance of being an artist.
Art has always been a thread woven into the fabric of Peg and Awl, but on a personal level through the past ten years it had become a thing that Margaux and I would fit into the cracks of responsibility. Then in 2016 Margaux attended an illustration workshop in Spain and she was awakened. Art transformed into a necessity, and every day she devoted several hours to drawing, painting and writing. As I watched it feed her soul, I began to feel the pull myself. I decided to apply for a juried workshop taught by Jeremy Mann and Nadezda, and hosted by Art Escape Italy. I applied and waited, doubting I would be one of the 17 chosen. When I got the acceptance email I was ecstatic and nervous, with a underlying feeling of “what did I get my self into?” After months of struggling through the required homework of copying every page of Bridgman’s Complete Guide to Drawing From Life (which I did not complete before the trip), I hopped on a plane with my paints, brushes and canvases and headed to Tuscany, Italy.


Along with 16 other aspiring artists, I stayed at a secluded retreat situated atop a hill surrounded by vineyards and orchards. For 6 days we were immersed in instruction, reading, discussion and painting with Jeremy and Nadezda as they shared their passion for what it means to be an artist. One night we all set up along the edge of the hill and painted the landscape before us. I had never plein air painted before and had no idea what a plein air kit was. But as I taped a gessoed and toned canvas to my palette, threw a few paints and brushes in my pockets and sat down in the grass, I was enthralled.
The way that Jeremy explained the process was delightful. He had built a small plein air set up out of an old cigar box. His canvases were 4″ × 5″, and the box was small enough to fit in his hand while he painted. Inside was everything he needed: a glass palette, reused film canisters for liquin and turpentine, small whittled-down brushes and miniature paint tubes. This portable pochade box was so manageable that he always had it with him, and the scenes that he painted were amazing color studies and sketches that captured the aura of the moment. That night I decided to design a box that I could take on my own adventures.


On the flight home, I sketched out a rough plan and within a few days of my return I had made the first prototype. Made of walnut with a vegetable tanned leather cover and shoulder strap, it housed all my painting supplies and four canvases that could be stored safely when wet. I took it with me everywhere and stopped to paint whenever I saw a moment that I wanted to capture. For the next 8 months I made modifications, perfecting the design and usability of the Scout Plein Air Box in preparation to finally share it with the world.
I look back to one year ago when I was preparing to leave for Italy and I see how I have grown as an artist. Plein air painting has changed my life. The excitement of slinging my pochade box over my shoulder and setting out on a painting adventure is intoxicating. Being able to set up anywhere within a few minutes has encouraged me to paint often, to more closely observe the things around me, to hone my memory as I strive to capture a fleeting moment, and to constantly learn how to mix colors. It has taught me the importance of being in the moment, and of considering the physical world around me and my relationship with it. Plein air painting has helped me to live more like an artist.

Watch the Walkthrough of my Scout Plein Air Box.
Plein Air Kit Preview and Backstory
I surveyed the hills and valleys in front of me. The land was covered in org...
Read The Post -
We’ve made another video installment to our Bookbinding Tutorials – this one is in response to all of the detailed questions you’ve been asking about our materials. I’ve also shared a little of my bookbinding history—where you can see my old falling apart journals as well as some insides and a variety of antique leather outsides!
We’ve made another video installment to our Bookbinding Tutorials – this one is in response to all of the detailed questions you’ve been asking about our materials. I’ve also shared a little of my bookbinding history—where you can see my old falling apart journals as well as some insides and a variety of antique leather outsides!
Chapters:
0:00 List of Materials
0:32 How Margaux Got Started Bookbinding
1:37 Margaux’s Early Journals
2:59 Overview of Materials
3:31 Thread
4:07 Needle
4:38 Tape
5:14 Headband
5:38 Mull
5:49 Glue
6:03 Cover
8:32 Paper
9:07 ConclusionBookbinding at Home Part 4: Materials and Meanderings
We’ve made another video installment to our Bookbinding Tutorials – this one ...
Read The Post -

My mom and I have always gone to flea markets, and we couldn’t pass by an abandoned house without stopping in for a little time-travel. Even a good trash picking was never a source of embarrassment. Dumpster diving in ‘work clothes’? Not a problem. Giving rescued objects a new life after so many decades of idleness is irresistible – especially in our throwaway society.
My mom and I have always gone to flea markets, and we couldn’t pass by an abandoned house without stopping in for a little time-travel. Even a good trash picking was never a source of embarrassment. Dumpster diving in ‘work clothes’? Not a problem. Giving rescued objects a new life after so many decades of idleness is irresistable – especially in our throwaway society.
Years ago I met an old woman at a flea market who was a designer for Wanamaker’s Department Store. She was selling scrap from decades past. I loved visiting her booth for her stories and her textiles, and I made many clothes for myself from her castaways. And then there was the Rementer House where Flossie and Jack had neatly arranged their early years (clothing, dishes, Christmas cards, photographs, boy scout uniforms, &c) into the attic of their home in the ’50s. I found it decades later and rescued many treasures, including my first tiny fabric time capsule – a small bundle from the early 1900s. It contained a larger outer piece and many small pieces wrapped within. No piece was too tiny to save. I used them as trimming for my journal edges – something we now do at Peg and Awl with all of our journals.
I’ve since found many more bundles, as well as feed sacks made of the very same textiles that could be found in clothing catalogs of the time (the farmer’s wife and daughters would make clothes, curtains and kitchen towels from them), and other scraps (with selvage) ranging in width from 24″ to 44″ (the loom width helps to determine the age of the textiles).
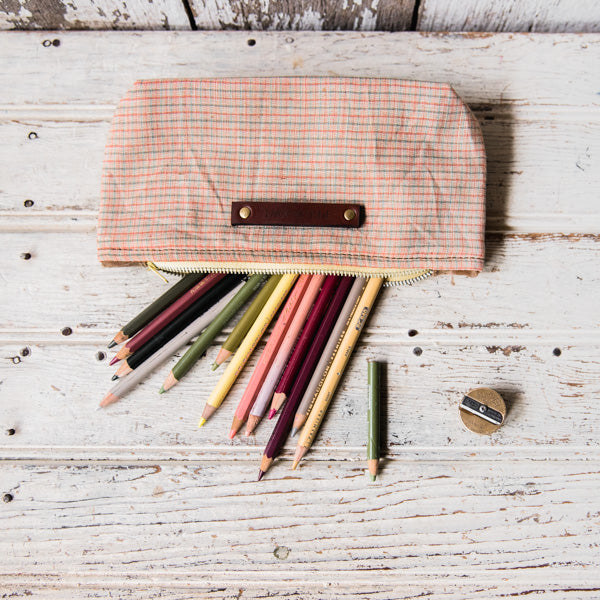
This Summer Pouch collection is made from found bundles, feedsacks, and scraps from the late 1800s to the 1960s. They are limited to the number of pouches we were able to make from each piece. We’ve lined each one with waxed canvas. The Essential style is finished with vintage zippers, and the rest with black YKK zippers. Browse the collection now, and sign up for our newsletter to be notified when it becomes available next week!
Enjoy!
Browse the Full Collection!
New Collection of Summer Pouches made with Vintage Textiles!
My mom and I have always gone to flea markets, and we couldn’t pass by an ...
Read The Post -
Søren and Silas having a go at making coverless journals for their homeschool science projects!
Søren and Silas having a go at making coverless journals for their homeschool science projects!
These are the materials the boys are using:
1. Needle – bookbinding needles have roundy tips and big eyes, but most needles will work!
2. Thread – any thread will do. If it is super thin, double it up.
3. Pencil – grab your favourite pencil to plot your stitching holes.
4. Paper – this is for the inside. Do you like lined paper, sketch paper, the back of used paper, graph paper? Gather your favourites, mix ’em up or stick to one!
5. Thumbtack – or something sharp to poke holes through paper and cardstock.
6. Scissors – for snipping your thread.
7. Fabric – this will serve as your linens that will hold the book together. Happy treasure hunting!
8. Glue – to glue your fabric to the front and back covers of your book. Elmers works!The boys are following the same process as in our Bookbinding Tutorial, Part Two, showing how to make your own coverless journal. Happy stitching!
The Brothers Kent Bookbinding
Søren and Silas having a go at making coverless journals for their homeschoo...
Read The Post -
Here is the last video in our first bookbinding tutorial series: Bookbinding at Home. Thank you all for following along and sharing your books. We are so psyched to see all of the books that have come out of these tutorials!

Here is the last video in our first bookbinding tutorial series: Bookbinding at Home. Thank you all for following along and sharing your books. We are so psyched to see all of the books that have come out of these tutorials! We hope you find comfort in the process of binding your books as well as filling them. There is certainly a lot to document right now— in both pictures and words.
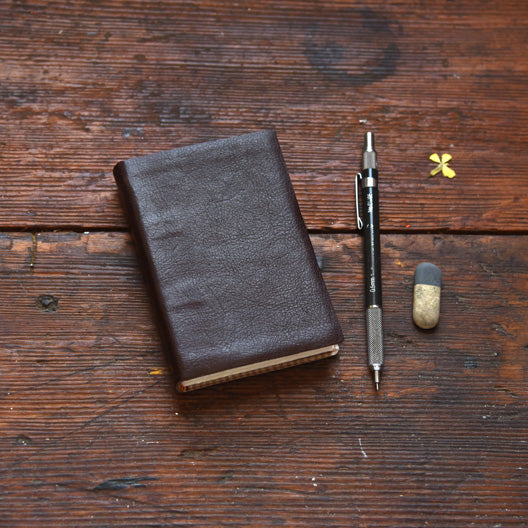
We love seeing your books and sharing in our Instagram stories and posts (@pegandawl) – be sure to use #quarantinebookbindingclub and/or #pegandawlbinds on your social media posts so we can find you!Project No. 3: Covering a Journal with Leather
Here is what you will need:
Leather – If you have scrap, an old jacket or wallet, anything soft and malleable, have it ready! Scraps of many colors are also available from many sellers on Etsy.
Fabric – This will replace mull (a starched cheesecloth) that will be glued directly to your book block to strengthen your book.
Thread – For the headband. Aim for something thick that will take up space. You can also use a pre-made headband.
Scissors – For trimming your cover. If you are using leather for your cover, make sure they are sharp!
Hammer – For shaping your book block. Be sure it is clean as it will be coming in contact with your paper! (I used a rock hammer and my pages don't hide it!)
Glue – For gluing your leather to the front and back covers of your book. Elmers works!
Heavy Book – This will be your book press! Any heavy book will do, though I find art books (and their dense pages) perfect for the job!Bookbinding at Home Part 3: Covering a Journal with Leather
Here is the last video in our first bookbinding tutorial series: ...
Read The Post -
So here we are again – still at home and pleased to share our next installment of our Bookbinding at Home series! We hope you have found some small things to enjoy in this time of truly slooooowing down. For me it is always the small things that brighten my days, like watching Toots and Yedda – our goose landmates – and transforming a pile of field stone into an elegant yet makeshift garden path!
As for the tutorials, we are learning a lot (we hope you are too) and are so grateful for everyone who is joining us!
Bookbinding at Home: Part 2
So here we are again – still at home and pleased to share our next installment of our Bookbinding at Home series! We hope you have found some small things to enjoy in this time of truly slooooowing down. For me it is always the small things that brighten my days, like watching Toots and Yedda – our goose landmates – and transforming a pile of field stone into an elegant yet makeshift garden path!
As for the tutorials, we are learning a lot (we hope you are too) and are so grateful for everyone who is joining us!
Project No. 2: Stitching Signatures for a Coverless Sketchbook


Here is what you will need:
1. Needle – bookbinding needles have roundy tips and big eyes, but most needles will work!
2. Thread – any thread will do. If it is super thin, double it up.
3. Pencil – grab your favourite pencil to plot your stitching holes.
4. Paper – this is for the inside. Do you like lined paper, sketch paper, the back of used paper, graph paper? Gather your favourites, mix ’em up or stick to one!
5. Thumbtack – or something sharp to poke holes through paper and cardstock.
6. Scissors – for snipping your thread.
7. Fabric – this will serve as your linens that will hold the book together. Happy treasure hunting!
8. Glue – to glue your fabric to the front and back covers of your book. Elmers works!
We get most of our bookbinding tools and materials from Talas, including needles, thread, linen tape and other materials we haven’t explained yet. The waxed thread that I am using is a 3 ply waxed Irish Linen thread.
We love Strathmore drawing paper for our journals and find that and other supplies through Artist & Craftsman. Both the latter and Talas are small companies who have shut down their physical locations but are currently taking online orders and shipping!
As for covers, vintage textiles, needle boxes and vintage tools – you can find all kinds of unexpected magic at home as well as on Etsy and eBay. We at Peg and Awl absolutely encourage creativity in materials and tools, and finding vintage stuff is a nice way to reclaim some of the excess of items that already exist on our planet. This is also a way to make your project and your desk specifically yours!
Bookbinding Glossary
Sheet: The unfolded paper pages that you start your project with
Folio: A folded sheet
Signature: Gathering of folios
Leaf: One half of a folded sheet
Page: Each side of each leafPlease share your little books with us with hashtag #quarantinebookbindingclub – we’d love to see what you are making, and share the results!
The Next Step…
Continue on with our next bookbinding project: covering a coverless book! We will only be covering a book, so bring your coverless book from this project to the next installment.
And While You’re at Home…
If you are housebound or feeling antsy, there are oodles of projects online and on Instagram. I’ve found inspiration from The Good Ship Illustration’s drawing guide The Sketchbooker’s Friend. The first tip is pretty great:
NO PHONES. Don’t take a photo, then draw from it. Don’t finish your drawing at your desk later. It is NOT ALLOWED and we are very strict!
Bookbinding at Home, Part 2: How to Stitch a Coverless Journal!
Bookbinding at Home: Part 2 So here we are again – still at home and please...
Read The Post -

Bookbinding at Home
The state of the world – and the pause it is giving – has me thinking about and enjoying the small things in life – like wild violets, meringue cookies, and the scritchy-scratchy sound a pen makes. It has also brought me back to the early days of making books, and the small things that made them so special.
As a result, we have put together a long overdue tutorial on bookmaking. I have prepared a list of things you will need to make your first notebook. This is a very simple start—you can use materials that you have at home and anyone, any age can join in! So, let’s make books!
Project No. 1: Single Signature Notebook
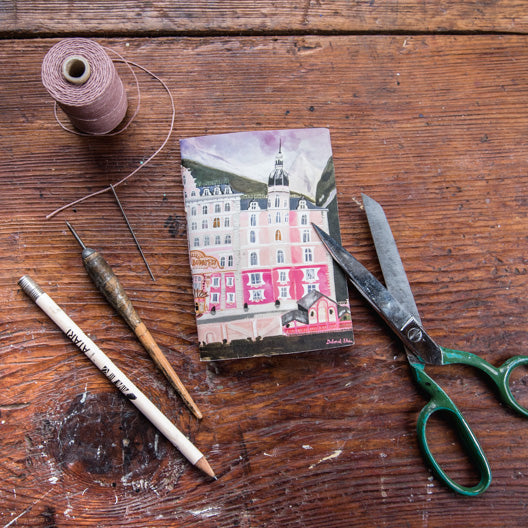

Postcard by @deborah.j.stein Card by Egg Press and tea box from Yogi Tea Here is what you will need:
1. Needle — bookbinding needles have roundy tips and big eyes, but most needles will work!
2. Thread — any thread will do. If it is super thin, double it up.
3. Pencil — grab your favourite pencil to plot your stitching holes.
4. Paper — this is for the inside. Do you like lined paper, sketch paper, the back of used paper, graph paper? Gather your favourites, mix em up or stick to one!
5. Cover – raid your recycling bins and cupboards for tea boxes or snacks whose boxes you adore. Use this time to clean up your drawers find postcards and note cards saved. All of these things make wonderful covers for little book!
6. Thumbtack – or something sharp to poke holes through paper and cardstock.
7. Scissors for trimming your cover.
If you have everything on this list at home, great! If you don’t and wish to order online – PLEASE consider buying from small businesses and Etsy sellers who REALLY need everyone’s support.
Visit our blog for the how-to process video! Please share your little books with us with hashtag #quarantinebookbindingclub – we’d love to see what you are making, and share the results!
Coming Soon…
Stay tuned for our next bookbinding project: a coverless journal like our Anselm Bookbinding Kit! You do not need the kit to join, but if you’d like to get started with one (it includes a bookbinding needle!), find them on our shop.
If you are housebound or feeling directionless, there are oodles of projects online and on Instagram including the #quarantineartclub hosted by @CarsonEllis, a live book club for kids by @MacBarnett, and, coming up – one of my personal favorites, the #100dayproject!
Bookbinding at Home, Part 1: How to Stitch a Single Folio Sketchbook
Bookbinding at Home The state of the world – and the pause it is giving...
Read The Post -
Due to COVID-19 we have closed our shop to the public for the near future, but our online shop remains open, and we are shipping orders on Tuesdays and Fridays! We will be shipping and disinfecting and are around to answer any questions that you may have.
Though we are all affected by this situation in many different ways, let us make the best of a tough time by learning something new, or catching up on something old. Whether you’re making more food at home, cleaning the darkest corners around the house, or maybe even checking some long delayed home and gardening projects off of your list, we hope that you are able to use this curious time to enjoy the small things as well!
Peg and Awl and COVID-19
Due to COVID-19 we have closed our shop to the public for the near future, bu...
Read The Post -


I am getting many inquiries about my Iris Painter’s Palette and the paints that are in it. I shall get to that, but first I have a little story to tell…
I am getting many inquiries about my Iris Painter’s Palette and the paints that are in it. I shall get to that, but first I have a little story to tell.
I remember getting my first list of vocabulary words in elementary school. That week the words seemed to show up everywhere: in conversation, in books I read, wherever I went. I walked into the classroom, gobsmacked, and shared the news with my teacher. Each week brought new lists and new coincidences. Decades later, my life is still filled with this magic. The synchronous deluge doesn’t just happen with words – it happens with so many things, including our falling into the world of geology and paint.
One cold winter, Peg and Awl was set up at the Chelsea Holiday Market in New York City for a week. After so long in our makeshift shop, I was set free to stretch my legs in the cold, wet, snowy streets of Manhattan. I typed ‘art store’ into Maps and found Kremer Pigments. When I opened the door, it felt like I had traveled back in time. As I stared at the bags of pigments, the connection between them and the paints I so loved hit me like a thunderbolt. I muttered some incomprehensible thing to the shelves and shelves of coloured dust. The pigments that made the paint came from the earth under my feet: malachite, azurite, epidote, garnet. I had fallen into a world of pure magic!
Fast forward to so-called ‘adulthood,’ and like the vocabulary words that were everywhere, the Family Kent were suddenly, literally, swimming in natural history relics that could be transformed into paint! In a river in Vermont, we found rocks embedded with garnet. In Pennsylvania we met a retired science teacher who bought a cabin precisely because of its location atop ochre mines (he gave us red and yellow ochre in a variety of forms). We sifted through the sand at Calvert Cliffs (whilst swimming in the Chesapeake Bay) and found shark teeth, biominerals, and ancient coral. Gobsmacked, over and over again.
At Peg and Awl, we have bags of treasures to crush and mix and play.
I feel our jumping into this world is not complete without that story, because understanding where these colours come from was what brought this epic journey into the realm of magic.
There are invisible things all over, and it’s not until we’re able to focus (through direction or discovery) on what has been heretofore concealed, can we see the words and the materials we use every day.
So now, the colours in my palette:
• Magnetite
• Noir Mineral*
• Azurite
• Celadonite
• Malachite
• Epidote
• Iron Oxide Red
• Burnt Iron Oxide
• Ombre Nature*
• Cote de Azur Violet
• Ocre Havane*
• Ocre Jaune*
*these are from France, from 40+ years ago, via Belgium. This entire paint adventure includes in insane number of rabbit holes, just look at this: Ochre Quarry in France, via Atlas Obscura.
If you are up for the challenge of making your own paints, you need some tools to begin. If you wish to circumnavigate the making, I will provide a list below with some glorious paint makers! Like most “that looks easy enough!” processes it is rather complex and expensive to begin. But if you are up for the challenge, it is oh so fun!


Tools
I started with the following tools:
1. a muller
2. palette knives
3. tempered glass palette
4. mortar and pestle (I have loads from flea markets)
5. dropper
6. kremer’s premade medium
7. palette (our Iris!)
8. pigments
9. glass jars (I bought some from Kremer and also use saved spice jars!)
Paintmakers
• Kremer, obviously, in NYC and Germany.
• Case for Making – CFM paints are creamy and delicious and their website is full of beautiful accessories from other makers whose goods they stock. Alexis and crew also introduce the world to artists and workshops and just so. much. magic.
• Greenleaf & Blueberry – G+B paints are unbelievably prepared. If you try to make paints, you will see the challenge in putting paint into a palette neatly, and without cracks. These guys are the masters at this! Their paint, too, is glorious. And Jess’s newsletters are of the few that I read from beginning to end.
• Beam Paints – Anong is the daughter of paint makers and artists in Canada. Her stories, process and ingenuity are ever-so inspiring. Anong makes countless sustainable palettes and presentations for her paints. She shared with me the ancient Egyptian Paint Palette that inspired our Iris!
• Early Futures (pigment shop) – I found Heidi via instagram and following her journeys is another epic adventure, and her pigments and the stories that accompany them are a complete treasure to transform!
Other Resources
• The Kremer Pigmente Recipe Book – beautifully photographed and so informative!
• Illustoria Magazine – I love this magazine and this month is the Color Issue!
Making Paints for Iris!
I am getting many inquiries about my Iris Painter’s Palette and t...
Read The Post -

We are very psyched to announce our only batch of tintype journals for the year! I’ve collected more historic tins for what has become an annual event at Peg and Awl.
This past weekend, the Peg and Awl team traveled back in time with @gilesclement and his partner Kendra, witnessing and partaking in many tintype and ambrotype sessions at the Peg and Awl workshop (read our blog post about that here). When I pour over each portrait from the 1800s, choosing the right one for each journal, giving them new names, I wonder about the day, the preparation, who the photographer was. I wish I had a time machine to hear their conversations, to witness their awkwardness and unexpected giggles, that nearly always ended with a grim countenance.
Browse our newest Tintype collection here, and sign up for our newsletter to be notified of the launch time! Go ahead, find your favourite, and fill the pages within with your stories and let us wonder what another 150 years will bring.
New Tintype Collection Coming Soon!
We are very psyched to announce our only batch of tintype journals for the y...
Read The Post