Blog
-
We put together a little video so you can make your own book for the #100dayproject! Enjoy, ask questions, and share with us on Instagram so we can see your projects too!
We put together a little video so you can make your own book for the #100dayproject! Enjoy, ask questions, and share with us on Instagram so we can see your projects too!
#qbbc100days
#quarantinebookbindingproject
#pegandawlbindsPlease note: this tutorial is specifically about page count. Click here for the full Bookbinding at Home Tutorial: Stitching a Coverless Journal.
In this video, I’m making two books at a time, both specifically made for the 100 day project. They are both the same size with just a few variations. I find this project to be a really nice reason to get out and observe the world.


These are the two journals, highlighting different colors and vintage textiles! Here you can see a full journal spread dedicated to one day! When you’re making a book for a particular project, it’s really important to consider both paper size and page count of your book. I’m making this book for my 100 day project, so I’m going to consider how many pages I will need for the 100 days. Usually, I like to dedicate a full spread to one day, so I’m going to need double the pages, though in some instances, I’ll use one page per day.
Journal Page Planning
If your 100 day project will consist of one spread per day, then you will need 52 sheets, which is the size of one full page spread open. Once you fold a single sheet in half, it’s called a folio. You'll be putting 4 folios inside of each other and that will make up one signature. You will have a total of 13 signatures. That will give you 202 pages, not counting the front and back cover. The few extra pages can come in handy for notes or whatever you may want to add.If you want to make a book that is dedicating one page to a day, then you will need 27 sheets. You’ll be putting 3 folios inside of each other, and that will make up one signature. You will have a total of 9 signatures. And this will give you 106 pages not counting the front and back cover.
Bookbinding GlossarySheet: The unfolded paper pages that you start your project with
Folio: A folded sheet
Signature: Gathering of folios
Leaf: One half of a folded sheet
Page: Each side of each leaf
Now that I’ve finished folding and tearing my signatures, I’m going to measure out where I want the textiles to be sewn onto the spine of the book. I’m going to start with my quarter inch ends – this is for the end knots.

The end knots form lines along the ends. 

Measuring and marking my linen and thread layout on one signature. Then, marking another signature and putting one in front and one in back of the stack. Usually, I would now put these signatures into a clamp, and use a ruler to connect the front and back markings in a straight line. However, if you don't have a clamp, these double-sided marks will help. In the video, you can see how I use a jeweler saw to make the holes, instead of poking them one at a time (once again, for full instructions: Bookbinding Tutorial - How to Sew a Coverless Journal).
Now I am just going to cut some of this wonderful vintage textile that I found in an abandoned house.

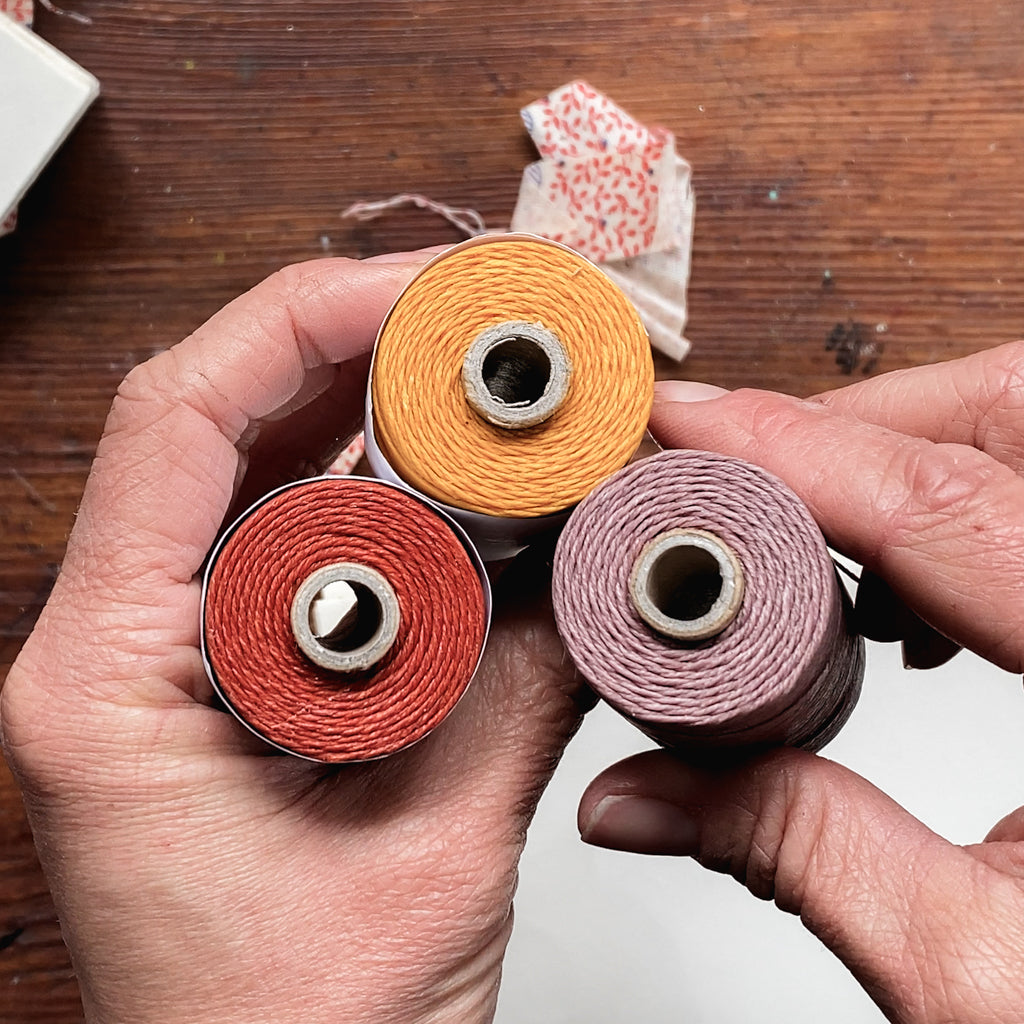
I am making the strips an inch wide so they can really show off the pattern. A lot of you have been asking what kind of thread I am using; this is a 3 ply waxed Irish Linen thread. I have 13 of these signatures, and I’m going to measure 13 lengths of wax thread, slightly larger than the length of the spine. I don’t want a lot of extra thread, because the longer your thread is, especially for a big book like this, the more tangled it’s going to get while you’re sewing. Also, if you cut your thread too short so that you have less to manage, you’re going to have to knot it somewhere in your book, which is not a big deal (but I don't like doing it).


This feedsack textile was in a bundle that I found in my favorite abandoned house that belonged to Flossie and Jack. Step-by-step sewing instructions! I have been incorporating antique materials of all kinds into the work that I do for most of my life. I love the stories that they hold, the character, and the quality of these old things. This fascination is what started me off on incorporating textiles into my journals.
My friend and I found all of Flossie’s dresses in the attic of her abandoned house; we washed them and wore them for years. We saw all the evidence of the patching and the stitching as these were likely from the depression era.
This red feedsack was originally stitched together to make a bag for grain, and then people would use the patterns and the normal cotton feedstock textiles to make clothes; so this was most likely the negative space from the pattern that was cut, and then they used a piece to tie the entire bundle together.
I am using this delightful leftover for my journal.


Just one stack of many vintage textiles we’ve used in our projects. Can you spot the vintage touches in these past sketchbooks? I’ve participated in this challenge for the last few years, as it encourages me to make marks daily. Some of the drawings in these sketchbooks took 5 minutes, others took hours. It doesn’t matter how long I spend with each drawing, just that I sat down to make some marks.
In 2021 I used Noodlers Black Ink (with the catfish on the front) and my left (non-dominant) hand for my 100 Day Project. I loved it so much that I've done it for nearly 300 days out of the year - that is three #100dayproject notebooks and a rather newly-skilled left hand!


A finished project. At my desk, with my Sendak Mini and Beatrix Caddies. 

I've been sharing my drawings on my art/family account on Instagram @thebrotherskent. I also write with my left hand. It was such a different experience from my meandering Morning Pages! Planning a Journal for the 100 Day Project
We put together a little video so you can make your own book for the #100dayp...
Read The Post -
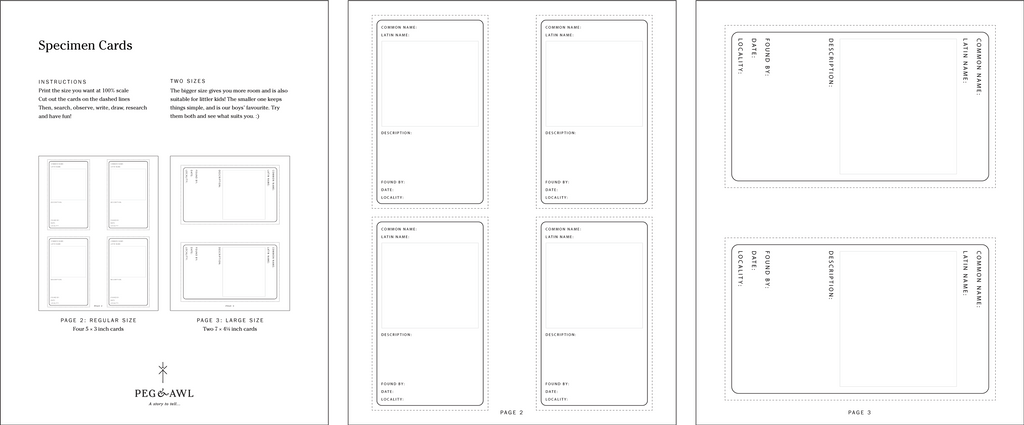
Whether embarking on a backyard exploration, a community science project, travelling near or far, or identifying mysterious objects around your house, these cards encourage observation, drawing, writing, and a touch of research. However you use them, we hope they inspire you to always keep an eye out for the little things!
The world is bursting with magic, and for anyone looking, it positively pulses. As a family of life-long learners, we felt compelled to share a few of our favourite activities in one compact notebook of removable cards (coming soon!). We are now in our 4th year of officially homeschooling our boys, which means full time of the stuff we did around the edges of their ‘normal’ education at public school.
We love the unknown and the ‘around the edges’ stuff like family bike rides, traveling, and art all day, and have always found places like Kahn Academy and Skillshare, to be grounding companions. With so many students of the world currently homeschooling, or hodge-podge schooling via Zoom and Flipgrid (like we are!), we have decided (thanks Silas!) to unearth this Peg and Awl project have turned it into a free downloadable PDF: Specimen Cards!
Whether embarking on a backyard exploration, a community science project, travelling near or far, or identifying mysterious objects around your house, these cards encourage observation, drawing, writing, and a touch of research. However you use them, we hope they inspire you to always keep an eye out for the little things!


Silas drawing daffodils on a portable desk made by Søren! Silas shows me his mushroom specimen! 

Sampling of the coming soon Specimen Card notebook. Collection of Specimen Cards by Silas! 

Designing the Specimen Card book – including Silas's original drawings! Closeup of updated Specimen Card, nearly finalized! Specimen Cards + Homeschooling (Free Printable)
The world is bursting with magic, and for anyone looking, it positively puls...
Read The Post -
We’ve made another video installment to our Bookbinding Tutorials – this one is in response to all of the detailed questions you’ve been asking about our materials. I’ve also shared a little of my bookbinding history—where you can see my old falling apart journals as well as some insides and a variety of antique leather outsides!
We’ve made another video installment to our Bookbinding Tutorials – this one is in response to all of the detailed questions you’ve been asking about our materials. I’ve also shared a little of my bookbinding history—where you can see my old falling apart journals as well as some insides and a variety of antique leather outsides!
Chapters:
0:00 List of Materials
0:32 How Margaux Got Started Bookbinding
1:37 Margaux’s Early Journals
2:59 Overview of Materials
3:31 Thread
4:07 Needle
4:38 Tape
5:14 Headband
5:38 Mull
5:49 Glue
6:03 Cover
8:32 Paper
9:07 ConclusionBookbinding at Home Part 4: Materials and Meanderings
We’ve made another video installment to our Bookbinding Tutorials – this one ...
Read The Post -
Here is the last video in our first bookbinding tutorial series: Bookbinding at Home. Thank you all for following along and sharing your books. We are so psyched to see all of the books that have come out of these tutorials!

Here is the last video in our first bookbinding tutorial series: Bookbinding at Home. Thank you all for following along and sharing your books. We are so psyched to see all of the books that have come out of these tutorials! We hope you find comfort in the process of binding your books as well as filling them. There is certainly a lot to document right now— in both pictures and words.
We love seeing your books and sharing in our Instagram stories and posts (@pegandawl) – be sure to use #quarantinebookbindingclub and/or #pegandawlbinds on your social media posts so we can find you!Project No. 3: Covering a Journal with Leather
Here is what you will need:
Leather – If you have scrap, an old jacket or wallet, anything soft and malleable, have it ready! Scraps of many colors are also available from many sellers on Etsy.
Fabric – This will replace mull (a starched cheesecloth) that will be glued directly to your book block to strengthen your book.
Thread – For the headband. Aim for something thick that will take up space. You can also use a pre-made headband.
Scissors – For trimming your cover. If you are using leather for your cover, make sure they are sharp!
Hammer – For shaping your book block. Be sure it is clean as it will be coming in contact with your paper! (I used a rock hammer and my pages don't hide it!)
Glue – For gluing your leather to the front and back covers of your book. Elmers works!
Heavy Book – This will be your book press! Any heavy book will do, though I find art books (and their dense pages) perfect for the job!Bookbinding at Home Part 3: Covering a Journal with Leather
Here is the last video in our first bookbinding tutorial series: ...
Read The Post -
So here we are again – still at home and pleased to share our next installment of our Bookbinding at Home series! We hope you have found some small things to enjoy in this time of truly slooooowing down. For me it is always the small things that brighten my days, like watching Toots and Yedda – our goose landmates – and transforming a pile of field stone into an elegant yet makeshift garden path!
As for the tutorials, we are learning a lot (we hope you are too) and are so grateful for everyone who is joining us!
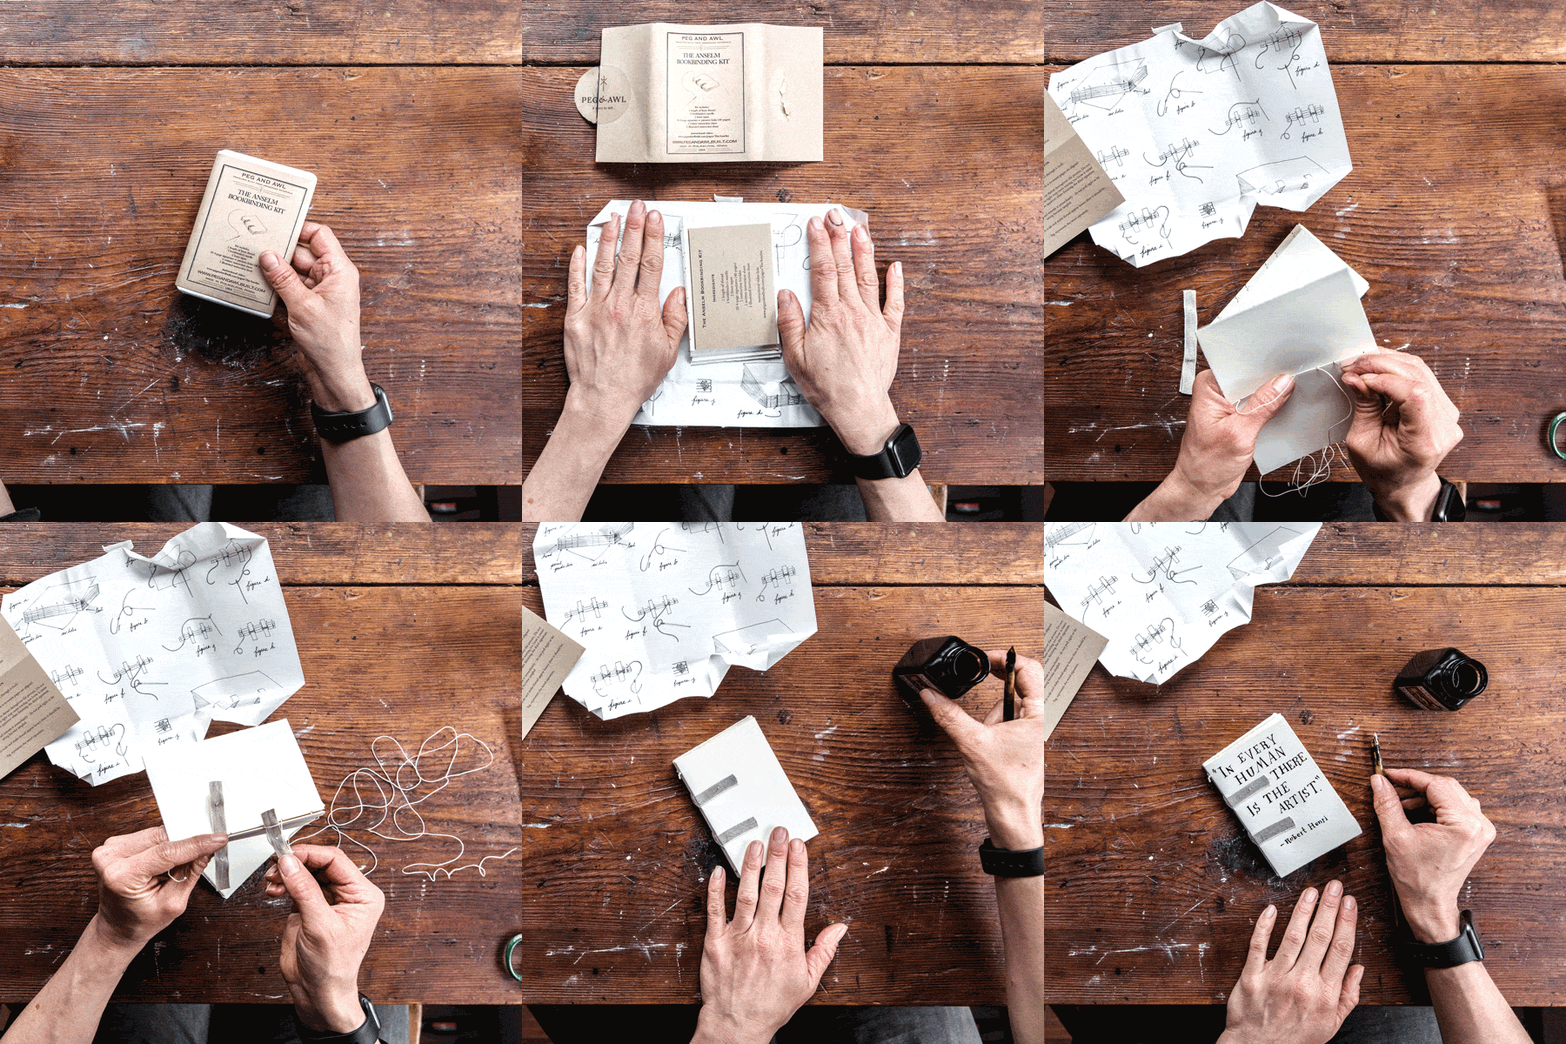

Bookbinding at Home: Part 2
So here we are again – still at home and pleased to share our next installment of our Bookbinding at Home series! We hope you have found some small things to enjoy in this time of truly slooooowing down. For me it is always the small things that brighten my days, like watching Toots and Yedda – our goose landmates – and transforming a pile of field stone into an elegant yet makeshift garden path!
As for the tutorials, we are learning a lot (we hope you are too) and are so grateful for everyone who is joining us!
Project No. 2: Stitching Signatures for a Coverless Sketchbook


Here is what you will need:
1. Needle – bookbinding needles have roundy tips and big eyes, but most needles will work!
2. Thread – any thread will do. If it is super thin, double it up.
3. Pencil – grab your favourite pencil to plot your stitching holes.
4. Paper – this is for the inside. Do you like lined paper, sketch paper, the back of used paper, graph paper? Gather your favourites, mix ’em up or stick to one!
5. Thumbtack – or something sharp to poke holes through paper and cardstock.
6. Scissors – for snipping your thread.
7. Fabric – this will serve as your linens that will hold the book together. Happy treasure hunting!
8. Glue – to glue your fabric to the front and back covers of your book. Elmers works!
We get most of our bookbinding tools and materials from Talas, including needles, thread, linen tape and other materials we haven’t explained yet. The waxed thread that I am using is a 3 ply waxed Irish Linen thread.
We love Strathmore drawing paper for our journals and find that and other supplies through Artist & Craftsman. Both the latter and Talas are small companies who have shut down their physical locations but are currently taking online orders and shipping!
As for covers, vintage textiles, needle boxes and vintage tools – you can find all kinds of unexpected magic at home as well as on Etsy and eBay. We at Peg and Awl absolutely encourage creativity in materials and tools, and finding vintage stuff is a nice way to reclaim some of the excess of items that already exist on our planet. This is also a way to make your project and your desk specifically yours!
Bookbinding Glossary
Sheet: The unfolded paper pages that you start your project with
Folio: A folded sheet
Signature: Gathering of folios
Leaf: One half of a folded sheet
Page: Each side of each leafPlease share your little books with us with hashtag #quarantinebookbindingclub – we’d love to see what you are making, and share the results!
The Next Step…
Continue on with our next bookbinding project: covering a coverless book! We will only be covering a book, so bring your coverless book from this project to the next installment.
And While You’re at Home…
If you are housebound or feeling antsy, there are oodles of projects online and on Instagram. I’ve found inspiration from The Good Ship Illustration’s drawing guide The Sketchbooker’s Friend. The first tip is pretty great:
NO PHONES. Don’t take a photo, then draw from it. Don’t finish your drawing at your desk later. It is NOT ALLOWED and we are very strict!
Bookbinding at Home, Part 2: How to Stitch a Coverless Journal!
Bookbinding at Home: Part 2 So here we are again – still at home and please...
Read The Post -

Bookbinding at Home
The state of the world – and the pause it is giving – has me thinking about and enjoying the small things in life – like wild violets, meringue cookies, and the scritchy-scratchy sound a pen makes. It has also brought me back to the early days of making books, and the small things that made them so special.
As a result, we have put together a long overdue tutorial on bookmaking. I have prepared a list of things you will need to make your first notebook. This is a very simple start—you can use materials that you have at home and anyone, any age can join in! So, let’s make books!
Project No. 1: Single Signature Notebook
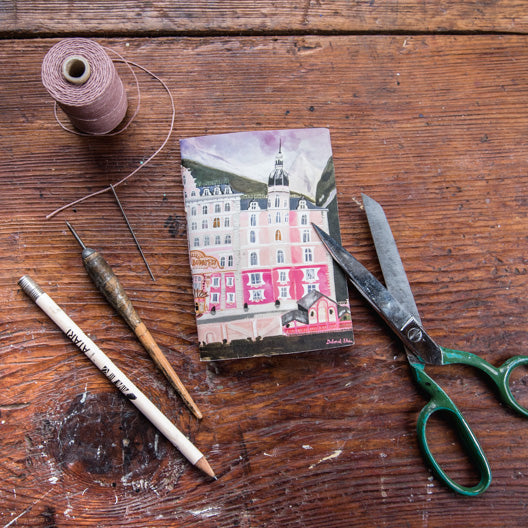

Postcard by @deborah.j.stein Card by Egg Press and tea box from Yogi Tea Here is what you will need:
1. Needle — bookbinding needles have roundy tips and big eyes, but most needles will work!
2. Thread — any thread will do. If it is super thin, double it up.
3. Pencil — grab your favourite pencil to plot your stitching holes.
4. Paper — this is for the inside. Do you like lined paper, sketch paper, the back of used paper, graph paper? Gather your favourites, mix em up or stick to one!
5. Cover – raid your recycling bins and cupboards for tea boxes or snacks whose boxes you adore. Use this time to clean up your drawers find postcards and note cards saved. All of these things make wonderful covers for little book!
6. Thumbtack – or something sharp to poke holes through paper and cardstock.
7. Scissors for trimming your cover.
If you have everything on this list at home, great! If you don’t and wish to order online – PLEASE consider buying from small businesses and Etsy sellers who REALLY need everyone’s support.
Visit our blog for the how-to process video! Please share your little books with us with hashtag #quarantinebookbindingclub – we’d love to see what you are making, and share the results!
Coming Soon…
Stay tuned for our next bookbinding project: a coverless journal like our Anselm Bookbinding Kit! You do not need the kit to join, but if you’d like to get started with one (it includes a bookbinding needle!), find them on our shop.
If you are housebound or feeling directionless, there are oodles of projects online and on Instagram including the #quarantineartclub hosted by @CarsonEllis, a live book club for kids by @MacBarnett, and, coming up – one of my personal favorites, the #100dayproject!
Bookbinding at Home, Part 1: How to Stitch a Single Folio Sketchbook
Bookbinding at Home The state of the world – and the pause it is giving...
Read The Post


