-


And here we are, another major transition! We are selling our Philadelphia building and moving Peg and Awl to our barn.

We’re Moving Out of Philadelphia
...and it's bittersweet!We are very fortunate – as a family and small business owners – to be able to follow our curiosities to wherever they may lead. Here we find ourselves in another major transition! We – Walter and I, Søren and Silas too, have decided to sell the Peg and Awl building in Port Richmond Philadelphia, and move our business into our Barn here in Chester County, Penna. It felt like a quick decision, but it was the culmination of much quiet consideration. I have always been spontaneous – or so it seems – so much is accomplished in our sleep.
Yesterday was warm and wondrous. As I walked from Port Richmond to Old City for a last minute hair appointment at Barnet Fair, and to treasure hunt at Vagabond Boutique, I felt the weight of nostalgia for what we would soon be leaving, and a lightness too, as I imagined floating, for the first time in a while, into a new unknown.
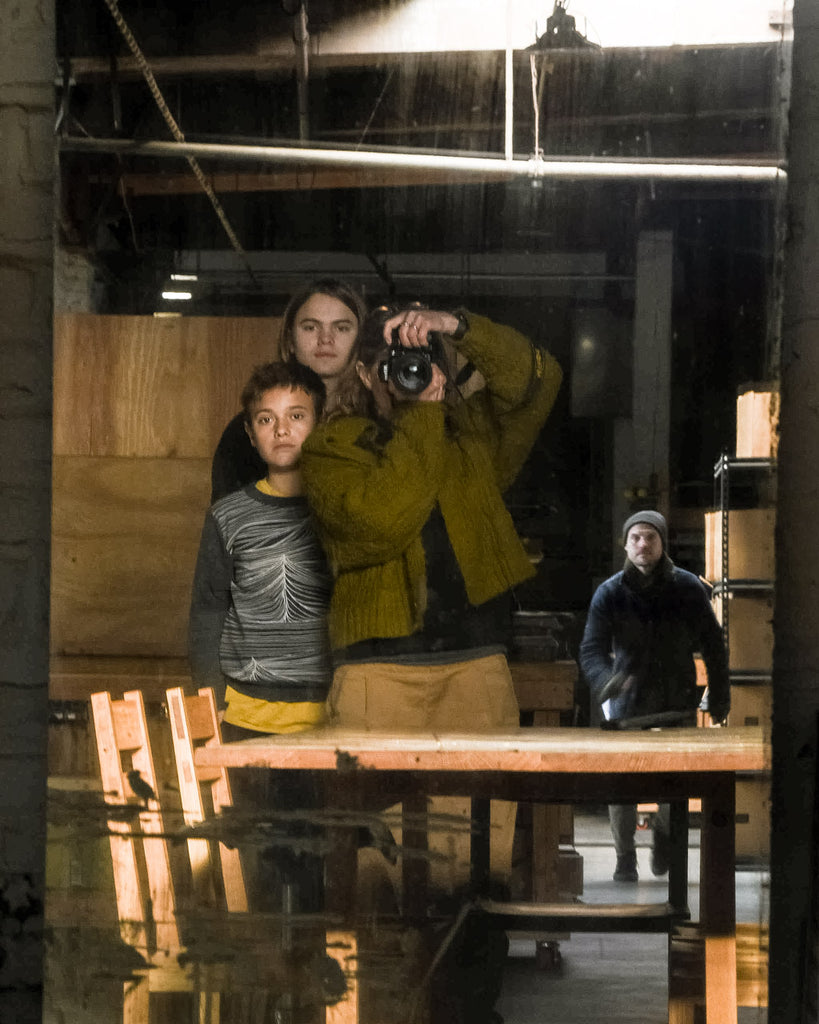

Lights off – we were about to leave on Saturday but paused for a quick mirror family photograph! Our barn as seen from the woods! Some Things to Look Forward to in the Coming Year!
- New Website! We’ve been working on it for a long time – we don’t have a launch date yet, but soon!
- New Jewellery! If you’ve been following along on Instagram – you may have seen some glimpses of these projects over the past few years.
- New Of A Kind Adventures! (accompanied by more Flea Market adventures, read here!)
- Exciting Pivots!
We will have a smaller space for to make and to store treasures, which is why we are reducing our catalog to our favourites and yours!
The Foundlings (Peg and Awl) Building: Before and After
Read about the Shop Renovation Project, here!
We’ve put a lot of work into our workshop since we bought the dark and closed-up building in 2016 – from opening cinder-blocked windows and tearing down walls, to transforming the gravel and pavement into gardens. We built and set up a storefront (that we never officially opened) just before the pandemic. We poured concrete floors and filled the wide open space with an abundance of tools and machines and worked with our wonderous crew to design, make, and ship all of the treasures that we share around the world.
We look forward to the next adventure for Peg and Awl and, too, for the building! The dream is always for some magic makers to take the reins and re-imagine a better, brighter, greener, and cleaner corner of Philadelphia.
A lot happens through word of mouth — if you know someone who may be interested, please share!

After
Storefront, trees, plants, and windows!
Before
A lightless old space full of stuff.


After
Employee gardens and honey bees~Before
Concrete slab (though locals told us it was a wading pool in the summers and an ice hockey rink in the winters!)

After
A part of the woodshop!
During
Pouring the concrete floor.

During
Knocking down the in-between wall.
Before 
Renovations and the inhabiting of the nearly abandoned building in Port Richmond, Philadelphia.


The Barn: Our New ShopRead On: Our Barn Restoration Project
We will continue to make treasures in Philadelphia over the next few months. In May, we will be opening our new workspace to the public for a Studio Tour in May! There we will share our art, showroom, and the goings on of the new iteration of Peg and Awl.

This space will be a gallery and showroom.

Walter’s cozy loft studio will remain Walter’s cozy loft studio.
Our Barn Restoration ProjectRead On: Our Barn Restoration Project
“...By the time we had finished removing the rotted bits, the trusses, the rafters, and the floors, it was hard to say if we were reclaiming an old barn, or building a new one in its image. The barn shape – the space within the frame – became one of the few parts I could solidly say remained from the historic place. But over the next few weeks, as I observed the delicate skeleton of the old barn standing strong but precarious in the wind and rain – with day now inside and night inside too – I grew suspicious of this boundaryless thing I wanted to keep. What were we preserving, and more, why?”


The Old Barn from the road. 

Original wall that divides the two parts of the barn. Pearl and Søren, my loves. A new view! We’re Moving Out of Philadelphia, and It’s Bittersweet!
We’re Moving Out of Philadelphia...and it's bittersweet! We are very fortu...
Read The Post -
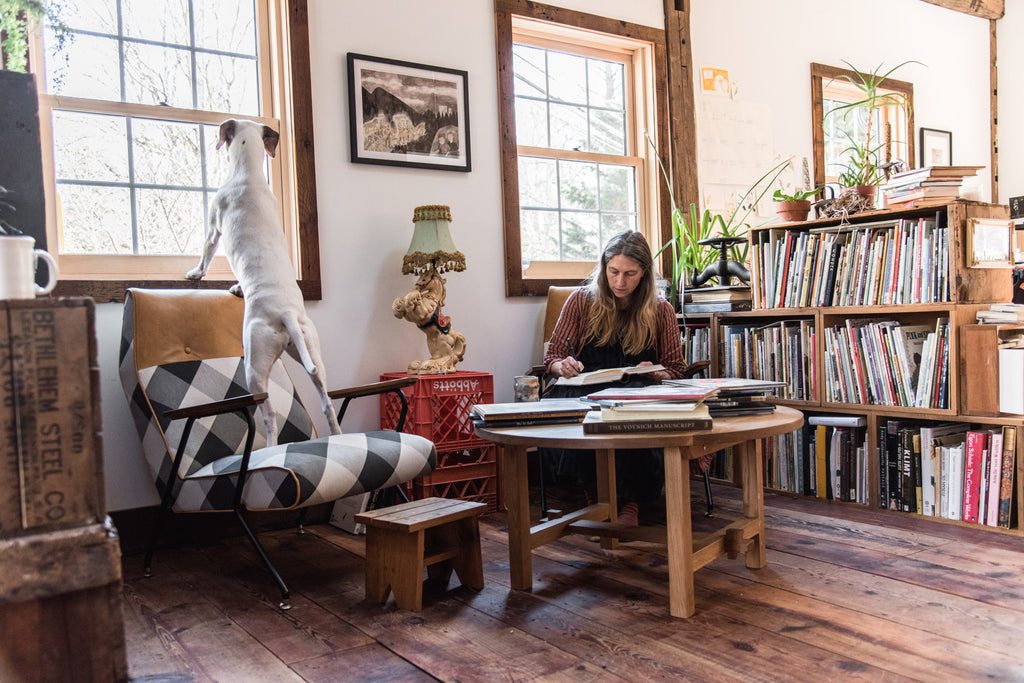
I am often overwhelmed by the stuff around me. I cannot keep it down. I cannot tame it. I want it all to leave but then I go to a flea market and things call out, and there I go, arms outstretched like a somnambulist. But then I play, and things happen. And they aren’t all good but that doesn’t matter. It is the moving, the shuffling, the brightening and widening of spirits and thoughts and ideas that matters.

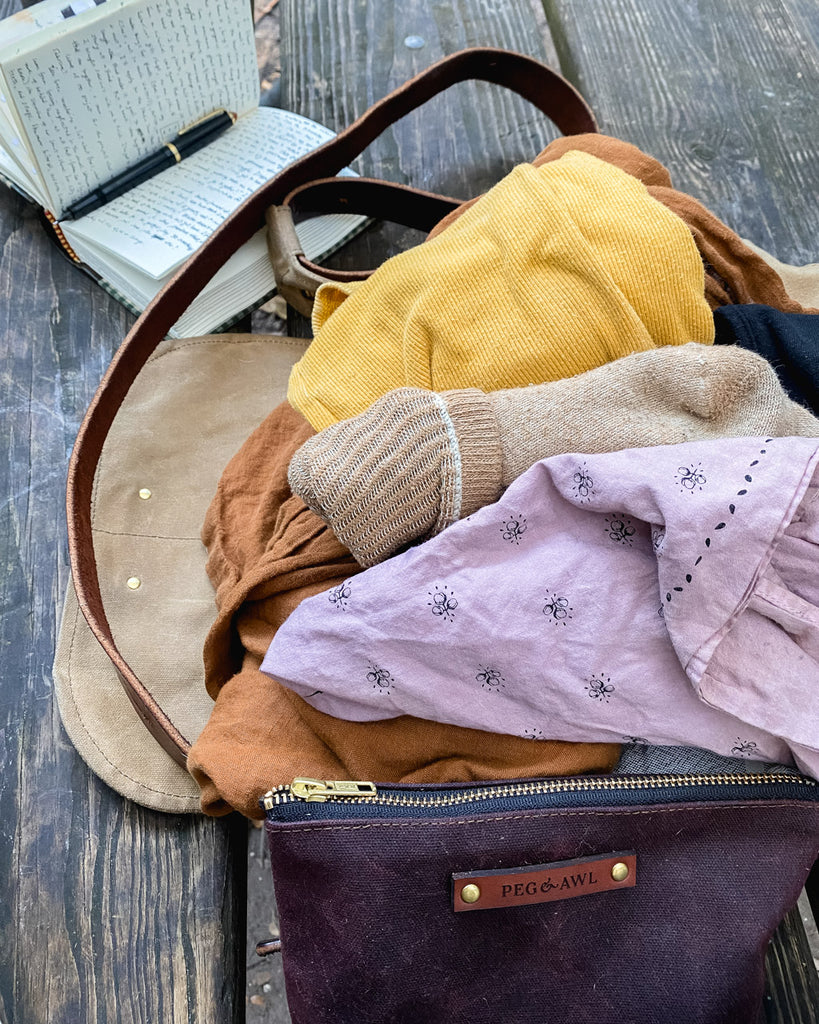
In A Warm WinterWe haven’t had much winter yet. There are random days when I am outside in a tank top raking old piles of previously ungardened debris as if Autumn is here to stay. Except, beneath the piles I’ve found thousands of eager green bits who tell me otherwise. The most enthusiastic of them are clumps of Snowdrops and Daffodils so abundant that I long for warmer rainy days so I can move them out of paths and thin them out so they can breathe – so they can take up even more space*.
Now that the mornings are a smidge brighter, I can see the fog that hangs in our little valley in the wee hours, and it lifts my fog-loving spirits. Being awake when the world seems mostly asleep is a gift I receive nearly daily.


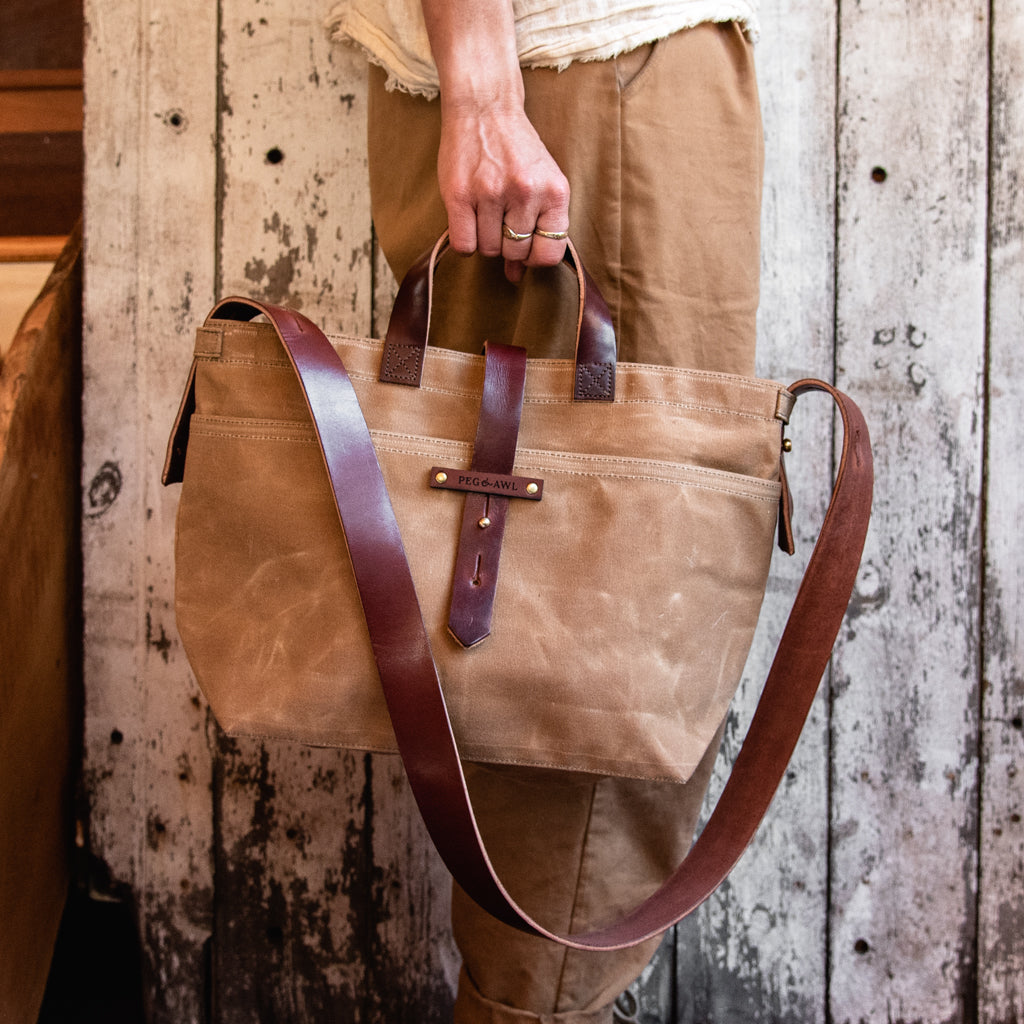
Small Batch: The Hunter Satchel in Fog Small Batch: The Waxed Canvas Tote in Fog
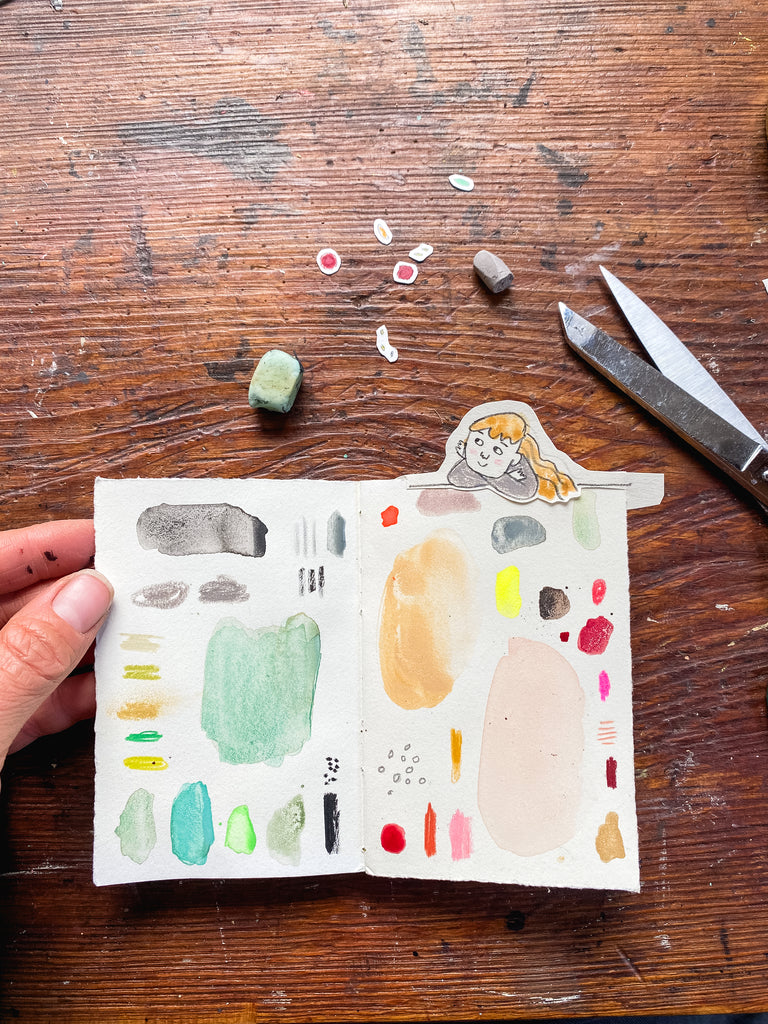
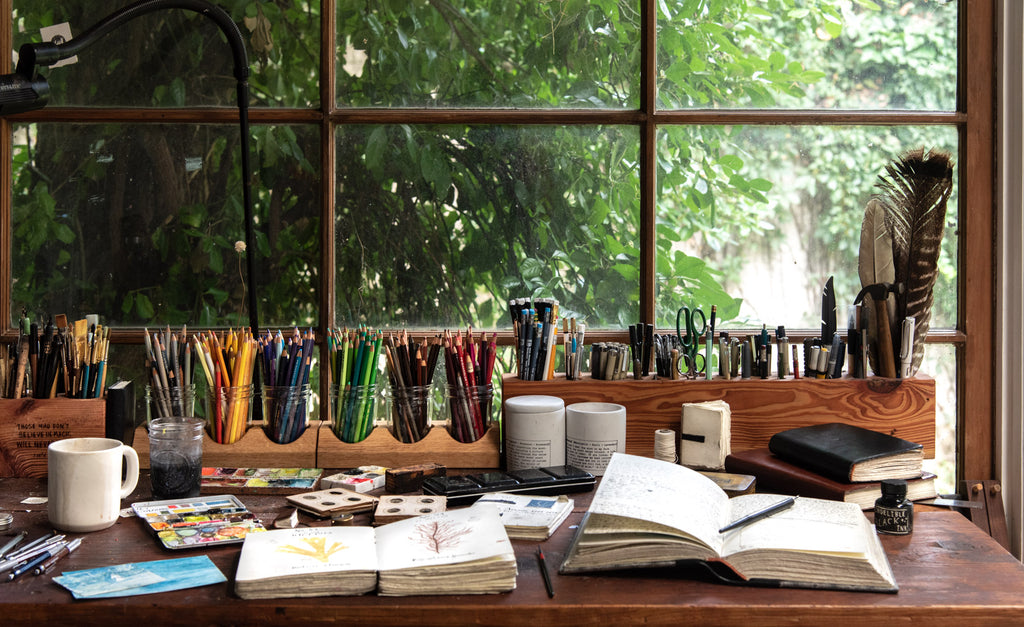
On My DeskShop Our Studio Collection!
I am often overwhelmed by the stuff around me. I cannot keep it down. I cannot tame it. I want it all to leave but then I go to a flea market and things call out, and there I go, arms outstretched like a somnambulist. But then I play, and things happen. And they aren’t all good but that doesn’t matter. It is the moving, the shuffling, the brightening and widening of spirits and thoughts and ideas that matters.
I shall not be tamed, and neither, I suspect, shall my stuff.

Mornings are for writing and drawing. And getting inky, inevitably. I love these journals! You can make them with our tutorials as your guide (here) or with our Anselm Bookbinding Kits (here).


Brush Rest Trio made from Antique American Chestnut. Small Carson Tome for morning pages and all manner of thinking on paper. 

“What keeps me up at night is wondering where I planted the Iris Cristatas. Where?” More drawings @beingmargauxkent “In the sun, 40 degrees feels summery. I removed my winter layers and embarked on the unplanting project at the 5 acre wood. Under piles of dead things, living things thrive! Thousands of daffodils anxious for springs’ arrival!” 

Sendak Mini Artist Roll in Almond
Projects In the WorksSign up for our email newsletter to be notified when we announce the launch!


Solvitur Ambulando Jewelry We will be joining the County Studio Tour in May!
Some Good Things- *I recently learned about moving plants in the rain in Elizabeth Tova Bailey’s The Sound of the Wild Snail Eating.
- How I Built This with Hank and John Green.
- One of the resources we use for Homeschool is Hank and John Green’s Crash Course. Søren and Silas’s favourite is Philosophy — so much so, they listen twice: once with Walter on the way to Open Connections (their co-op), and once with me on the way back!
- We also loved The Anthropocene Reviewed by John Green.
My Winter Studio – Left-Handed Drawings
In A Warm Winter We haven’t had much winter yet. There are random days whe...
Read The Post -
Walter and I started Peg and Awl on the 10th of January, 2010! According to my journal – which was blank – it was just a day like any other day.

Tin Type by Tyler Scaife 2011/2012. Tyler was one of our first employees and he helped us build the first woodshop (that we are standing in front of) in the backyard of our Philadelphia row home. Søren and Silas are here too, a blur, for the exposure was 45 seconds!
Our 13th Anniversary!
Walter and I started Peg and Awl on the 10th of January, 2010! According to my journal – which was blank – it was just a day like any other day. Though I’ve always kept a journal, I didn’t commit daily; a blank page now would absolutely denote a different kind of day! But as I sit, my butt pained by the raised root of this old Norway Spruce overlooking a cemetery on a seriously misplaced spring day, I think about how everyday is just another day, and too, how no days are just another day. It is perplexing, this life. Each day is a day to start something new, or a day to simply be. I am trying both.
–January 2020

Thank you for being here!
Walter and I write every newsletter and blog post, should you wish to reach out to us!
Though we forgot our anniversary date, we are daily grateful that the things we love to dream up, make, and use are enjoyed by others too – it keeps our creativity, spirits, and business going!
2023 will see us meandering off of familiar paths into unknown territory. A disruption is in order! Until then...
Some Things to Look Forward to in the Coming Year!
- New Website! We’ve been working on it for a long time – we don’t have a launch date yet, but soon!
- New Jewellery! If you’ve been following along on Instagram – you may have seen some glimpses of these projects over the past few years.
- New Of A Kind Adventures! (accompanied by more Flea Market adventures, read here!)
- Exciting Pivots!
Our Workspaces Through the Years!
The Backyard Shoppe (2010–2012) Photograph by Chris Crisman The Peg and Awl House (2010–2019) 

The Atlas Casket Factory (2012–2017)
Photograph by Parikha MehtaThe Current Shoppe (2016...)
This is where our treasures are made!
The Barn at the Five Acre Wood (2022...)Read about the Barn Renovation Project, here!


A view of The Barn from the woodland. 
A portrait of our family when we first moved here – we are due for a new one...


Walter takes his Scout Plein Air Box everywhere! As for me, journals and Sendaks are my constant companions.
Some Good Things
“A jack of all trades is a master of none, but oftentimes better than a master of one.”
–Robert Greene- Podcast: The full quote is so much more exciting than this misunderstood snippet. Have a listen to this episode of Simon Sinek’s A Bit of Optimism – he interviews the TSA head of socal media – Janis Burl. What a thrilling conversation about interruptions and zig zags!
- Currently Reading: Late Migrations: A Natural History of Love and Loss by Margaret Renkl
The Anniversary of Peg and Awl!
Tin Type by Tyler Scaife 2011/2012. Tyler was one of our first employees an...
Read The Post -
How New Years come around so quickly, these new years. 2022 was another weirdo, and we look forward to new and very different adventures, and too, very same adventures in 2023.
“If you like to write or draw or dance or sing, do it because it’s so great: as long as we’re playing around like that, we don’t feel lonely, and our hearts warm up.”
–from The Woman Who Killed the Fish by Clarice Lispector
Our Start of Year TravelsHow New Years come around so quickly, these new years. 2022 was another weirdo, and we look forward to new and very different adventures, and too, very same adventures in 2023.
“If you like to write or draw or dance or sing, do it because it’s so great: as long as we’re playing around like that, we don’t feel lonely, and our hearts warm up.”
–from The Woman Who Killed the Fish by Clarice Lispector

Søren drawing in his Anselm Sketchbook. Walter drawing in his Standard-Sized Harper Journal.
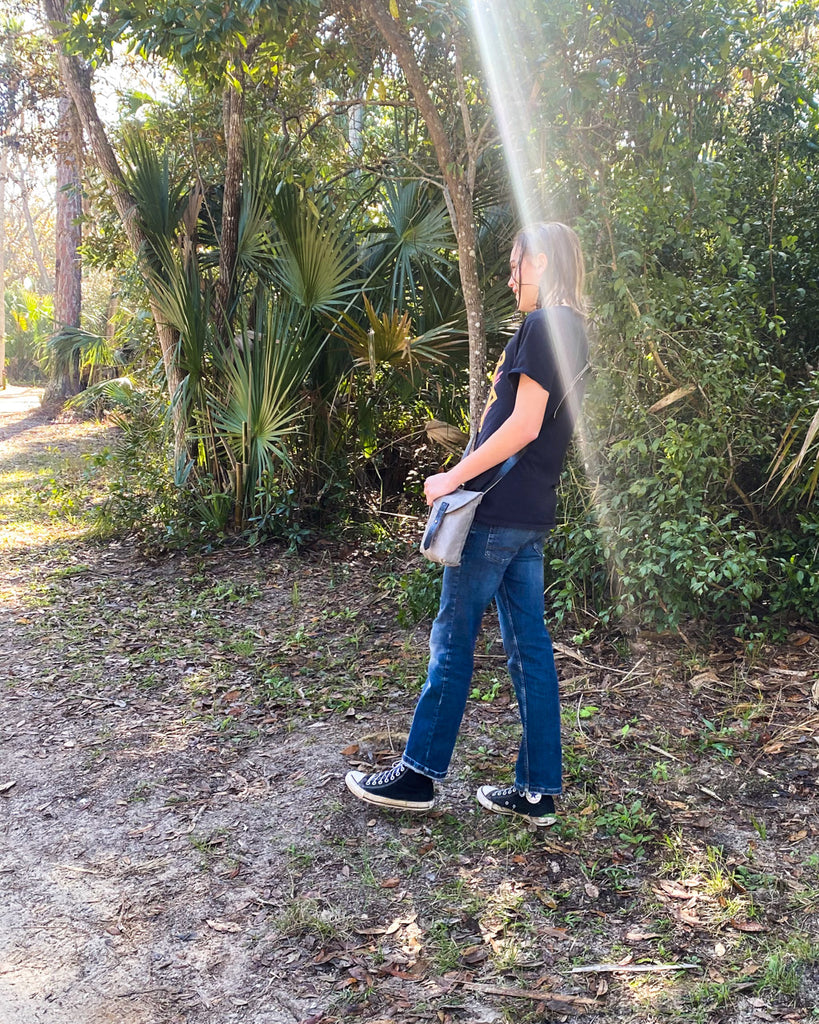
This morning I awoke in Florida, but I didn’t just arrive here and wake up and wonder, “where am I?” and discover, “oh, Florida!” No, we’ve been driving for days because cars are on roads with limits and not in the sky making endless paths, swarming around like insects or birds. On a road that should take us from Point A to Point B in 4 hours, took 8 or 12. But we’ve been listening to Tom Hanks read The Dutch House by Ann Patchett – time is suspended and none of us are disgruntled, but we stop the car and stretch and walk and that helps time confuse us all the more.This morning I crawled out of our camper and into the damp and still dark of Florida. In the morning darkness, which is lighter than nighttime darkness, I spied Spanish Moss above, dripping excess moisture onto me, and welcoming me to this new, strange place. What better way to go into the new year than this? My family sleeping a few feet away, new plants’ hellos. “Hello plants!” I am grateful for this exploration, and for this world of weirdness that is the same, but different, always, and always.

Autumn Colors: The Keeper Pouch One of our campsites! 

The Watson Serving Tray Myakka River State Park 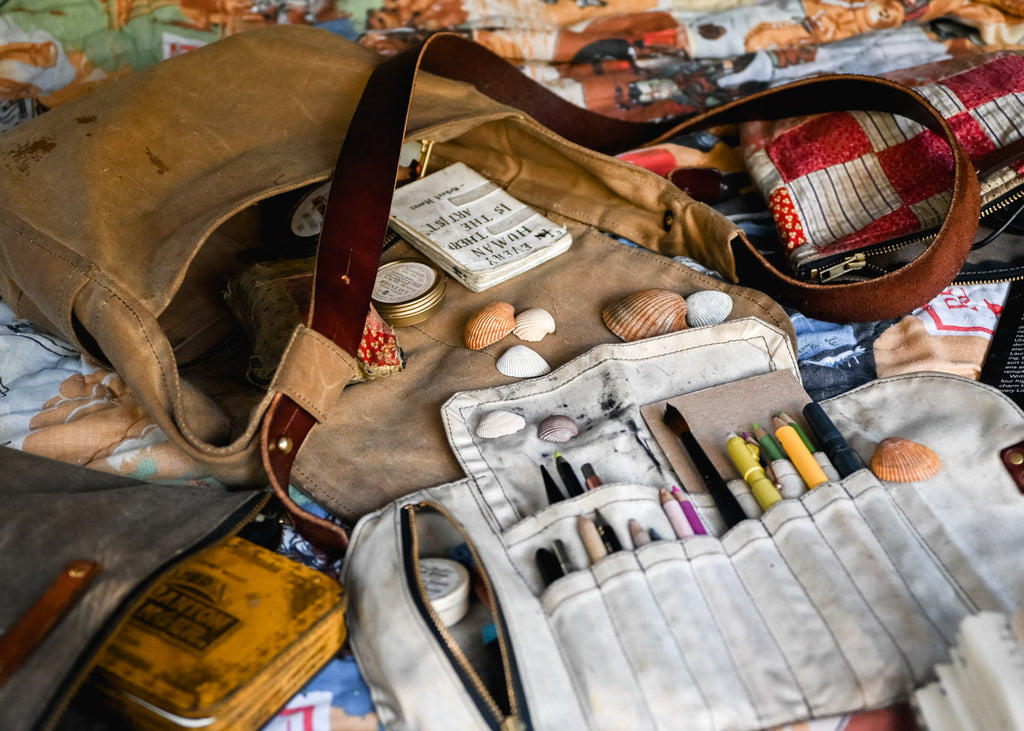
My Finch Satchel filled with art supplies! 

Fort Clinch, Florida 6” Anselm Bookbinding Kit 
The Sendak Mini Artist Roll 

The Maker Pouch Our On-the-Go Collection 
O’Leno State Park, Florida 
Hand-Bound Leather Tome Autumn Colors: The Small Hunter Satchel
Last Chance Classics!There is a lot leaving our shop, we know! In an attempt to alleviate the confusion, we've marked listings with Last Chance. Whilst some of the options are sold out, our drop down menus show what still have in stock and ready to ship!


The Marlowe Lunchbag Apothecary Caddy 

Desk Caddy with Quote Large Waxed Canvas Tote
Reminder: Some Colors are LeavingWe still have some almond bags in stock and ready to ship, along with the two other discontinued colours, Radish and Rook!

The Small Hunter Satchel The Rogue Backpack 

The Gatherer Bag The Reader A New Year with New Adventures (2023)
Our Start of Year Travels How New Years come around so quickly, these ne...
Read The Post -
We’ve watched all of the YouTube reviews of our Sendak Artist Roll (thank you!) and have made our own video to answer some questions and share our experience!
We are grateful for all the wonderful Sendak reviews, and for sharing videos and spreading the word!

We’ve watched all of the YouTube reviews of our Sendak Artist Roll (thank you!) and have made our own video to answer some questions and share our experience!
We are grateful for all the wonderful Sendak reviews, and for sharing videos and spreading the word!
Video Transcript
Hello, everyone! I wanted to give you a little walkthrough of our Sendak Artist Roll. I've been seeing a lot of other people's video walkthroughs and it's been inspiring me to do the same.
Introduction
Here is my very well-loved and very well-used Sendak. This is the first "right one" that we made. We went through a lot of trial and error to get to this, so I want to show you what it has the potential to hold.

Supplies in my Sendak: Scissors and Glue (0:30)I always have glue with me because I do a lot of messy collage work, so I love to glue things and I also have scissors for that same reason. I use small scissors if I'm traveling anywhere where I'm getting on a plane, and I use big scissors if I'm just traveling in a car. Both sizes fit into the Sendak nicely. I tend to put the big scissors on an end, in one of the smaller pockets. The smaller scissors fit anywhere, it just depends what else I have in my Sendak.
The Pencil Pockets (0:55)
One of the most common requests that we get and one of the things that people tend to comment on is that these pencil pockets are too small for fountain pens. While that's true of this Kaweco cap (the bottom fits, the top doesn't), this vintage technical pen is pretty chunky, and I put it in there all the time. I carry two or three. You can see how it kind of draws the Sendak together, so ultimately there's going to be a little bit less room in other pockets. It's making other things more tight, but really, it's fine.
When the Sendak is new, the waxed canvas might be tight to even just fit a pencil, but as you use it, it breaks in and loosens up, and then it doesn't loosen any further – that's where it's going to stay. Once you use it more, you can easily fit two standard pencils or paintbrushes into each slot, so it's really not a too small slot once you break it in.

Supplies in my Sendak: Pencils (1:35)I love these beginners pencils that have really soft lead. I love making marks that are a little less particular than, for example, when I'm using my mechanical pencils (which I also love).
So, these are some of the supplies that I carry every day. I think where the variation comes in, is in which pencils I want, which softness levels, or if I want a water soluble pencil. I'll put the pencils together in this end pocket. It's important to note that the Blackwing fits in. This Blackwing pencil was sharpened once and it makes it a perfect fit. This one was never sharpened, and the eraser is worn down a bit, so it's just above that folding point (the Sendak measures 7.75″ tall at the folding point). The taller one will obviously still work, but I know these are awesome pencils that a lot of people have, so I wanted to show you that.
Supplies in my Sendak: Pens (2:15)
Another thing that I carry are dippy pens. I will put pen nibs into a tin. I love using antique tins to store pen nibs, and in this case, a kneaded eraser. These tins are great for little art supplies, and I just put them into the zipper pocket.
The Zipper Pocket (2:30)
In addition to the vintage tin, I put another regular eraser. When pencils get too small for the pencil pockets, then I'll put them in the zipper pocket. I also have some extra lead for my mechanical pencils, a pencil sharpener, and I often have a whitewash in there as well. You can fit a lot in this zipper pocket.
I like to not overstuff my Sendak so that it folds nicely. I really like it to fold up rather than to roll up, which happens when it is very stuffed.
The Interior Pockets (2:55)
We have 16 pen and pencil slots in the front, and then we have four pockets behind those. So these four are varying widths – you could see the width of the smaller ones that I use for scissors or pencils, which measure 2.5″ wide. The larger two measure 4.25″ wide. I use these two bigger pockets for sketchbooks.
We make these Landscape Orra Sketchbooks in our shop. We designed them to fit into both this Sendak and the Mini Sendak. They can also serve as a tool protector if you need it, for example, if I was putting in a dippy pen whose nib needed protecting, or paint brushes, that would be a great tool protector. We also sell acrylic tool protectors separately if you don't want to carry a Sketchbook or Painter's Palette.
The Iris Painter's Palette is another product that we make. It is for squeezing in tube paints, watercolors, or in this case, making your own paint and filling up these wells with homemade paint. This was made to fit in both the Classic Sendak and the Mini Sendak as well, in these large interior pockets.

I'm going to put my palette here, and these pens in the back here with some small scissors. I want to have another paint brush and then whatever colors I want to bring. Sometimes I get really organized and other times I just put stuff in. You don't have to be crazy overthinking this. It's just really supposed to hold what you need – what you need for the day, what you need for a week, what you need for a trip.
I also often have a bookbinding needle held in the top flap here, and I'll put some bookbinding thread here in the zipper pocket, in case I want to make a book. I'll also prepare by having folded paper here in these exterior pockets.
The Exterior Pockets (4:30)
These two outside pockets otherwise are great for random sized sketchbooks like this – this would have been one of those random ones that I made. I also love this tin. It's for 15 neocolors, but I've had it for years and I move pastels or other more delicate stuff into here that I don't want to crumble in the pen pockets. It's a really nice fit for these back pockets.

This is our Orra Portrait Sketchbook, which we made to fit into the Classic Sendak. We have three sizes of these sketchbooks – the Portrait, the Large Portrait, and the Landscape.
Closing the Sendak (5:00)
So when I fold up the Sendak – this one is pretty full with everything that I just stuffed into the outside pockets – but when I fold it up, I will hold everything down and pull down this top flap so that it folds nicely. Then I roll in the sides, starting with the zipper pocket, so that all the parts of my Sendak are where they should be. Then I just synch it closed with the leather strap and buckle.
I'd say this is pretty full – I have stuff in every pocket. In some instances, I have more than one thing in a pocket. There's still a lot of room on this leather strap. So that's it! This will fit nicely into my bag, and I've got what I need for a long time.

The Buckle Closure
Another question that we've had is about this buckle. This comes from a gun sling from maybe the forties, and it was intended to function exactly as we use it. We found that it just really holds the Sendak together nicely, and of course, we love incorporating old bits wherever we can, into whatever we make.
So there you have it! My Sendak, lovingly worn in and full of life.

Mentioned in this video:
From Our Shop:- The Classic Sendak Artist Roll
- The Sendak Mini Artist Roll
- Iris Painter’s Palette
- Landscape Orra Sketchbook
- Portrait Orra Sketchbook
- Acrylic Tool Protects (Out of Stock)
From Other Shops:- Blackwing Pencils
- Kaweco Pens
- Neocolor
- Vintage art supplies (dippy Pens, technical pens, tins) are from flea markets and sometimes eBay!
Related Blog Posts:
The Sendak Artist Roll: A Walkthrough Video
We’ve watched all of the YouTube reviews of our Sendak Artist Roll (thank you...
Read The Post -
We’ve decided to discontinue a handful of our classics – some of which have been with us from the beginning! These treasures are limited to the quantities currently on our website and ready to ship. If there is anything you’ve been wanting, now is the time to scoop it up!

“The facts are sonorous but between the facts there’s a whispering. It’s the whispering that astounds me...”
–Clarice Lispector from The Hour of the Star
Since the start of our business, we’ve been making objects that change as we change – fast, slow, it is difficult to say. Perspective is mysterious!
As we reflect on the objects we make and have made, we feel ready for change yet again, ready to make space for new objects reflective of our new experiences and environments.
We’ve decided to discontinue a handful of our classics – some of which have been with us from the beginning! These treasures are limited to the quantities currently on our website and ready to ship. If there is anything you’ve been wanting, now is the time to scoop it up!View our Last Chance treasures, here.
As always, if you have any questions, send us an email at info@pegandawlbuilt.com
Bags for All OccasionsClick here for to view all last chance treasures.


The Weekender The Large Finch Satchel 

The Large Waxed Canvas Tote The Dopp Case 

The Reader 
Home and Kitchen CollectionClick here for to view all last chance treasures.


Olde-Fashioned Tree Swing Step Stool 
Studio and Decoupage
Click here for to view all last chance treasures.


Chalk Pad Large Desk Caddy with Quote 

Apothecary Caddy Decoupage Collection Last Chance for these Peg and Awl Classics!
“The facts are sonorous but between the facts there’s a whispering. It’s the...
Read The Post -
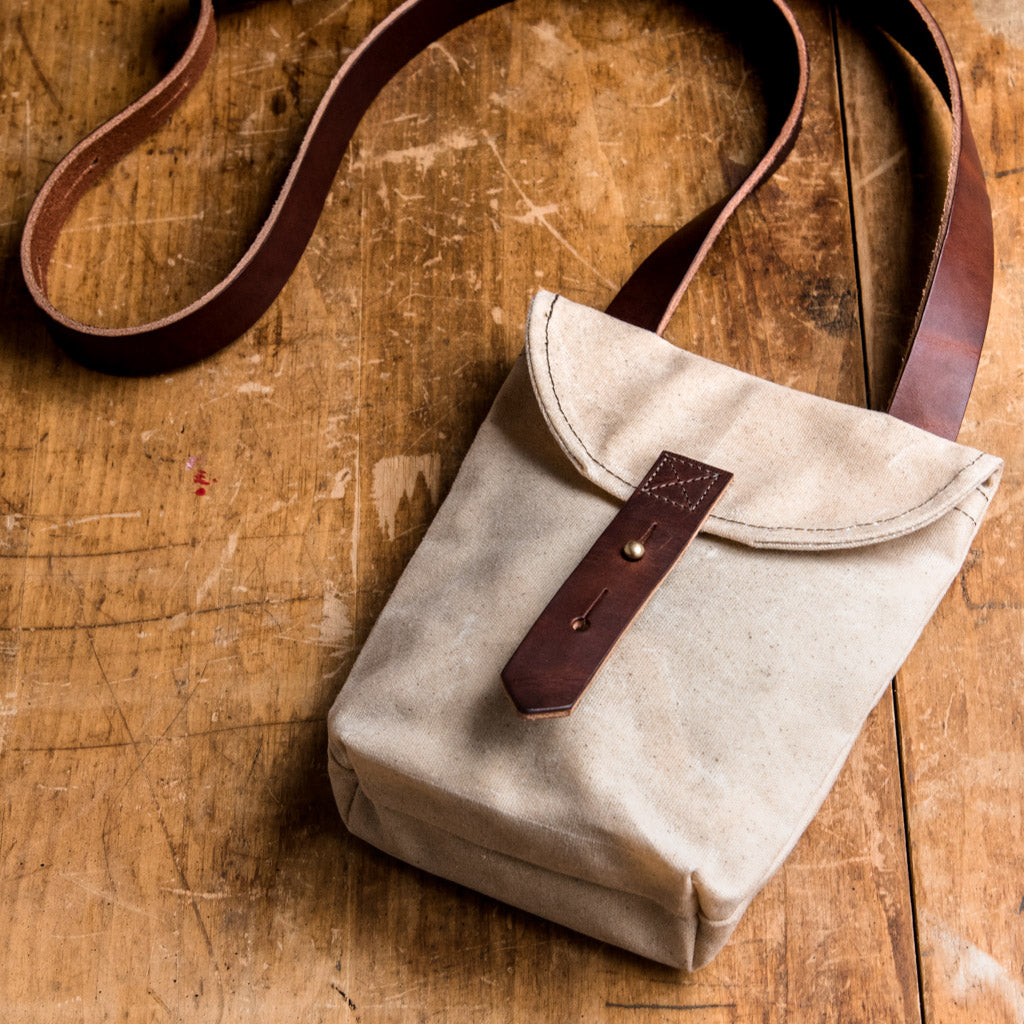
Inspired by Autumn, we’ve put together a small batch of some of our favourite bags in four new colours: Elderberry, Red Maple, Birch, and Fog. We’ve also chosen Red Maple for our Sendaks! These bags are constructed with the same durable waxed canvas we love, hand-dyed with special colours, and finished with our brown or black vegetable-tanned leather! As with all of our bags, these can be personalized.


We settle into the old mill as if it were home. Søren rests against what is left of a wall and opens his sketchbook to map out a world of his own invention. Silas walks back and forth on the high edge of the wall where once was a roof, headphones on, music playing. Walter and I unpack weekenders filled with clothes, masks, and our new autumn-coloured bags. Despite the calm, we are working under the Autumn sun and have little time. Pearl stuffs her wet and twitching nose into leaf piles, exploring worlds unknown to us.
Trees drop their leaves into and around what is left of the old Mill where women once gathered and chattered whilst waiting for warm bread. Our senses are ignited out here in this sentient place – amongst beings seen and unseen. There is an abundance of things to be grateful for, our lists are never long enough.
Inspired by Autumn, we’ve put together a small batch of some of our favourite bags in four new colours: Elderberry, Red Maple, Birch, and Fog. We’ve also chosen Red Maple for our Sendaks! These bags are constructed with the same durable waxed canvas we love, hand-dyed with special colours, and finished with our brown or black vegetable-tanned leather! As with all of our bags, these can be personalized.
Elderberry

Waxed Canvas Tote The Hunter Satchel 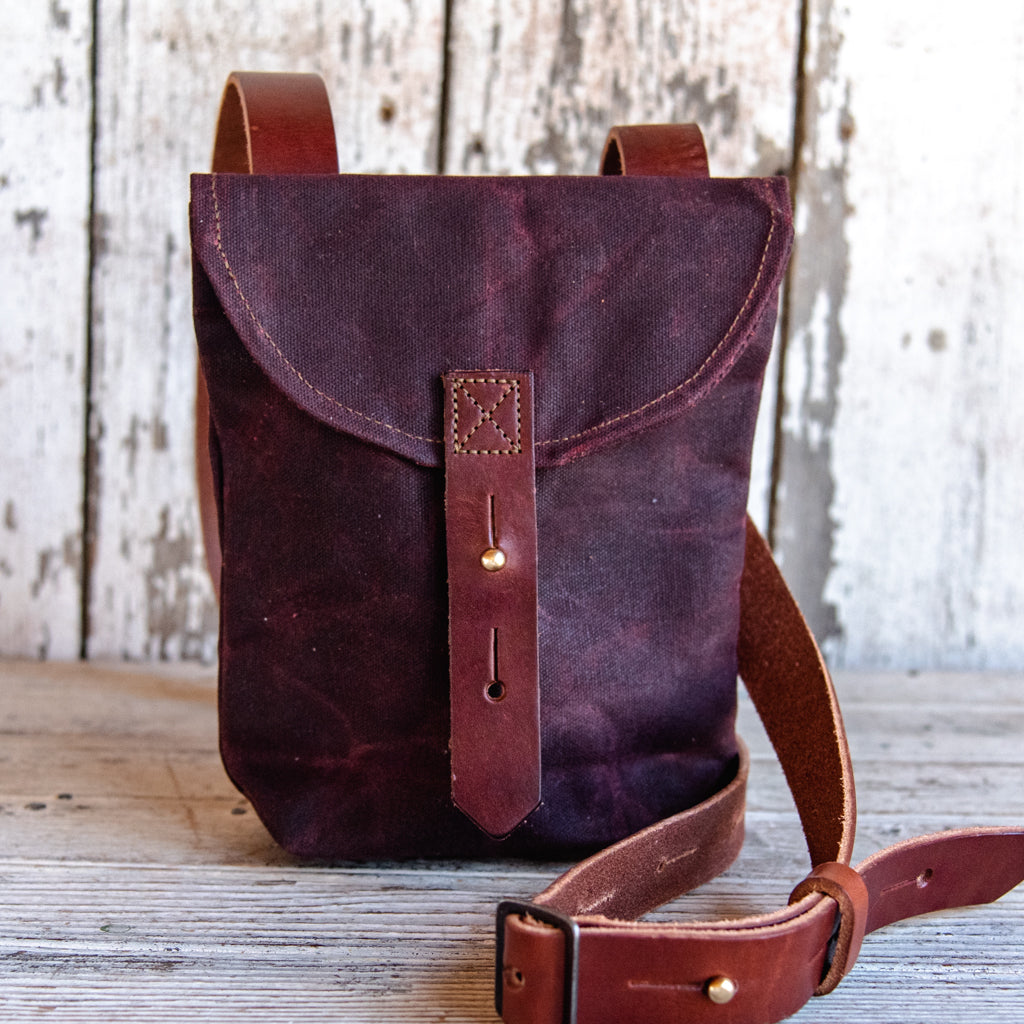

The Small Hunter Satchel The Keeper Pouch 

The Finch Satchel 

The Maker Pouch The Scholar Pouch
Red Maple
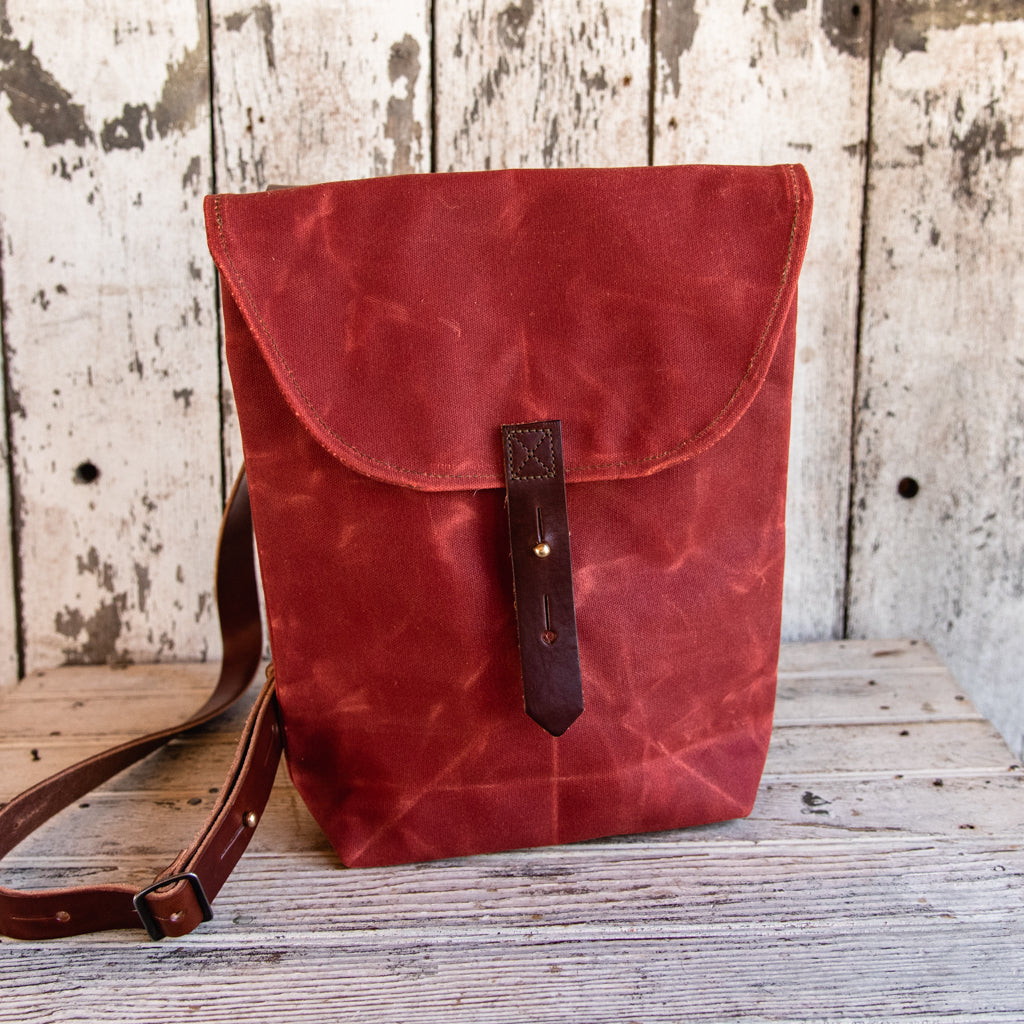
The Finch Satchel The Hunter Satchel


The Small Hunter Satchel Waxed Canvas Tote 

The Scholar Pouch The Maker Pouch 

The zipper pouch filled with my erasers, and sharpers. Sendak Mini Artist Roll 

The Sendak Artist Roll 4” Anselm Bookbinding Kit
Fog


Waxed Canvas Tote Mini Waxed Canvas Tote 

The Finch Satchel The Hunter Satchel 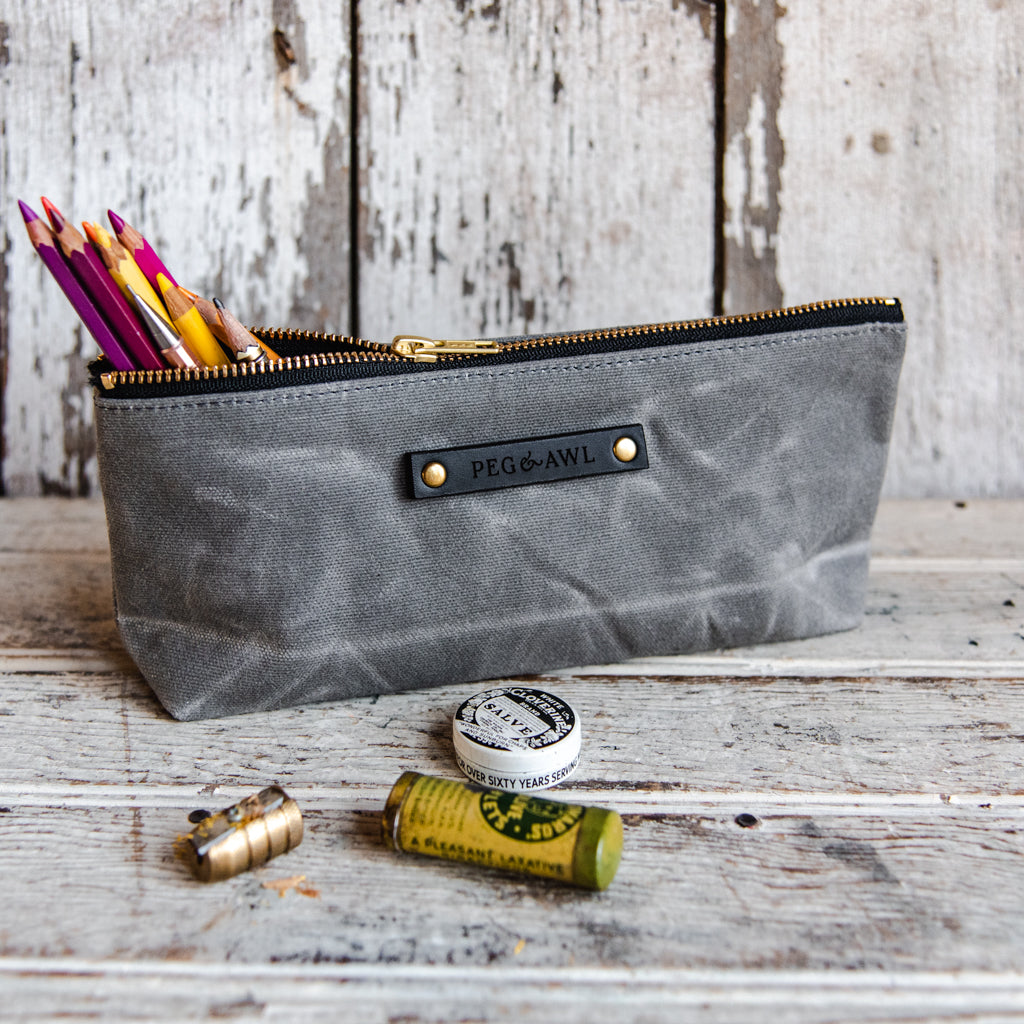

The Scholar Pouch The Keeper Pouch
Birch

Waxed Canvas Tote The Small Hunter Satchel 

The Keeper Pouch The Finch Satchel 

Mini Waxed Canvas Tote The Maker Pouch Our Collections Explained!
If you’ve been following along with us for a while, you may have noticed that not all launches are the same – some products stay for years, some fly off the shelves, and others fall somewhere in between. Here are some explanations to distinguish between our various collection types.
Standard Collections: Everything in our standard collections will be ongoing until we decide to stop making them! They may include some vintage or antique materials, (ex. journal fabric lining) but these details will vary subtly to ensure their ongoingness.
Small Batch Collections: Limited batches incorporating specialty or vintage materials where larger batches can be made, but are not infinite! The quantity ranges, but we aim for minimum of 100 in these collections.
Of a Kind Collections: Limited batches incorporating vintage or antique materials. Each object will be limited from 1–20 items depending upon our findings.
Small Batch of New Autumn Colours (2022)
We settle into the old mill as if it were home. Søren rests against what is ...
Read The Post -
As you may see from my list of Things I Love, I've been on a bit of a binge lately. I'm feeling a welcome change a-coming and it expresses itself through food, new adventures, new clothes, &c. (though as I reflected on last year's gift guide, I am also quite the same.)
May my list lead you down some enchanting rabbit holes!
As you may see from my list of Things I Love, I've been on a bit of a binge lately. I'm feeling a welcome change a-coming and it expresses itself through new food, new adventures, new adornments, &c. (though as I reflected on last year's gift guide, I am also quite the same.)
May my list lead you down some enchanting rabbit holes!ps: These are drawn with my non-dominant hand:) More @beingmargauxkent


Antique Tins
I may have a habit of vintage tins. I like to say I am NOT a collector, but I do fancy myself a gatherer. I love tins for hauling art supplies, soft things like pastels, and tiny messy things like pen nibs. And they make wonderful alternative sketchbooks. They fit nicely into my Sendak and pouches. And of course, I love a good Flea Market find — though Etsy and Ebay are great resources if you are patient!Bonsai
Silas is learning about Bonsai's for a Homeschool project and he got us all into it. Our garden, artist friend Kai, brought a bag of Bonsai-able trees for Silas, including: Azalea, Boxwood, Pines, Juniper, and Hercules Club. The places to look, he said, are parking lots and mowed areas where the roots are biggened as the tops are shorn! Abundance everywhere, for those who seek it!


Always More Books
I will never stop gathering books. Unread stacks surround me, but also, many are read and scribbled and delighted in. (PS: Padraig O'Tauma's book has been long preordered - check.)The Simple Folk
I stopped at my favourite Philadelphia shop, Vagabond, and found The Simple Folk linen dress (among other things)! So cozy, layerable, pocketed, swishy, and loooong. I have to tie it in a knot to bike and hike with it — but yay! I love it so.
Mentioned in this Post:
From Our Shop:
From Other Shops:
- Nikon Zfn Mirrorless Camera
- Providence Animal Shelter
- Duckfeet Boots
- Make Ink: A Forager’s Guide to Natural Inkmaking by Jason Logan
- Gardenheir
- Warwick Furnace Farm Lavender Goods
- Bonsai
- The Simple Folk
- Spruce Tip Jelly
- Omega Juicer
- Bellwether Farm Sheep Milk Yogurt
Related Blog Posts:
2022 Gift Guide: Things I love
As you may see from my list of Things I Love, I've been on a bit of a binge ...
Read The Post -

Here are some of my favourite little and big things. I am often overwhelmed by stuff I have, stuff I want, the general problem of stuff. But I was reminded the other day how important our small businesses are – to the economy, to those around us, to the people we work with and the materials we use – this all has value that is sometimes hard to see. This got me to really appreciating some of the little treasures around me –
Above: Our very best everyday present is our Pearl! We got her from Providence Animal Center last December and not a day goes by where don’t express our gratitude in our silly voices and normal voices, for being paired with the very best doggo in the world!
2021 Gift Guide to some of my favourite (mostly) small business treasures!
Here are some of my favourite little and big things. I am often overwhelmed ...
Read The Post -
Last month I spent a weekend at the Warwick Furnace Farm for a much needed impromptu escape with Claire Rosen (one of the farm’s sisters) and Emma Mierop of Skippy Cotton. We planned to take our worlds apart and put them back together again; we talked and explored the lavender fields, I scribbled in my journal in this new space, we visited a nearby museum, and more.

My Warwick Weekend.
Last month I spent a weekend at the Warwick Furnace Farm for a much needed impromptu escape with Claire Rosen (one of the farm’s sisters) and Emma Mierop of Skippy Cotton. We planned to take our worlds apart and put them back together again, but we only got as far as:
Taking our worlds apart over snacks and long lavender soaked discussions,
going for a long walk on a cold, star bright night,
understanding that a thing taken apart nearly always reveals more than expected, and therefore takes longer to put back together,
and nebulous plans for a next time.I also made some pretty classic Margaux messes everywhere I went. Claire seemed unbothered. See my dribblings and droppings below:


What a treat to have a morning like this! Lavender everywhere! 

I also love my Duckfeet Boots! Piles of things on the floor. I settle in quickly... 

Pearl and Honey enjoyed their freedom and new found friendship!
Warwick Furnace Farm
Claire and her family moved to Pennsylvania and started a Lavender farm where they make a variety of Lavender Delights, host an Artist’s Retreat, have an inspiring Gallery Space, etc. In addition to their combined love of Lavender, each family member follows their own varied passions in this magical space that they’ve created. Their farm is a short, beautiful drive from us…
Here are a few photographs of Claire’s fantastical and elaborate photographed worlds – her own individual passion.

Skippy Cotton
Emma’s shop is a delight! She combines her drawings, embroidery, and whimsy to form her own House of Curiosities! From ornaments to clothing to artist supplies – have a peek into her wondrous world. She has also navigated her way into the world of AI art and has made some enviable pieces with it (another can of worms we discussed with exuberance)!


Skippy Cotton's year-round ornaments! Which of course also look splended on a Christmas Tree!
Fragile Earth Exhibit at the Brandywine River Museum
Claire surprised us with a visit!


Mark Dion Ever a favourite, Søren and I spent an especially long time with his work, chortling and sighing, and all manner of involuntary noise making...So maybe I was a little noisier than Søren. 

James Prosek We investigated James’s mysteries close enough to set off alarms – lucky for us, there weren’t any. 

Jennifer Angus An abundance of bugs and tiny stories built into boxes and wall pieces. Everyone clambered to take in as much detail as possible; no one wanted to leave. My Warwick Weekend – An Impromptu Escape with Claire Rosen and Emma Mierop
My Warwick Weekend. Last month I spent a weekend at the Warwick Furnace Fa...
Read The Post


 Mini Waxed Canvas Tote